So you love bell peppers and have always dreamed of growing your own. Well, good news! It’s actually quite simple to grow bell peppers from the scraps you usually throw away. In this beginner’s guide, we’ll show you step by step how to turn those leftover bell pepper seeds and stems into thriving plants that will reward you with delicious peppers in no time. Let’s get started!
Selecting and Preparing Bell Pepper Scraps
Choosing the Right Bell Pepper Scraps
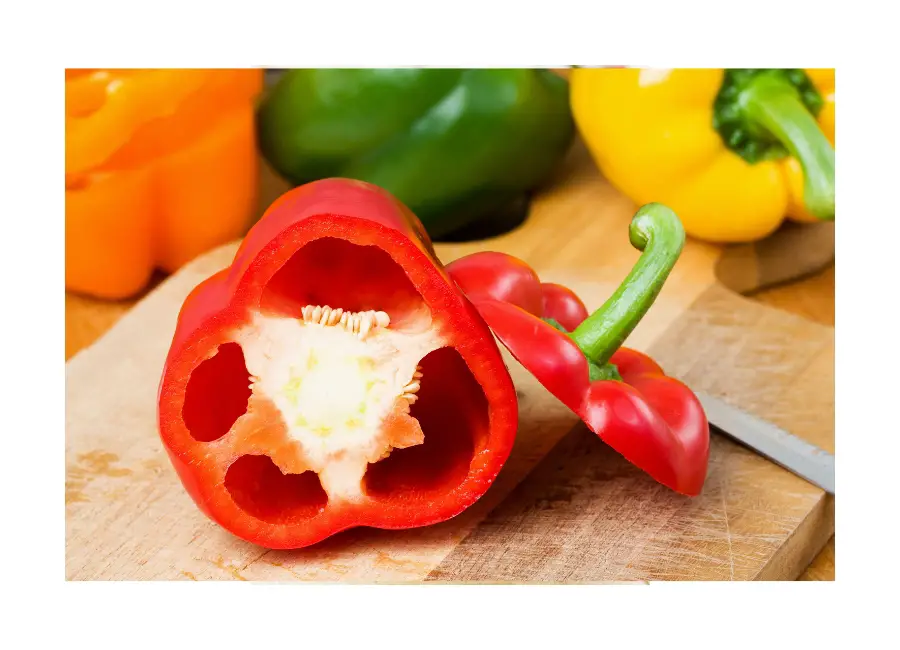
When selecting bell pepper scraps for growing, it’s important to choose healthy and ripe peppers. Look for peppers that are firm, vibrant, and free from any signs of rot or damage. The color of the pepper should be uniform, whether it’s green, red, yellow, or another variety. Avoid using peppers that are overly mature or have started to wrinkle. The quality of the bell pepper scraps will directly impact the success of your growing endeavors, so take the time to select the best ones available.
Preparing the Bell Pepper Scraps for Planting
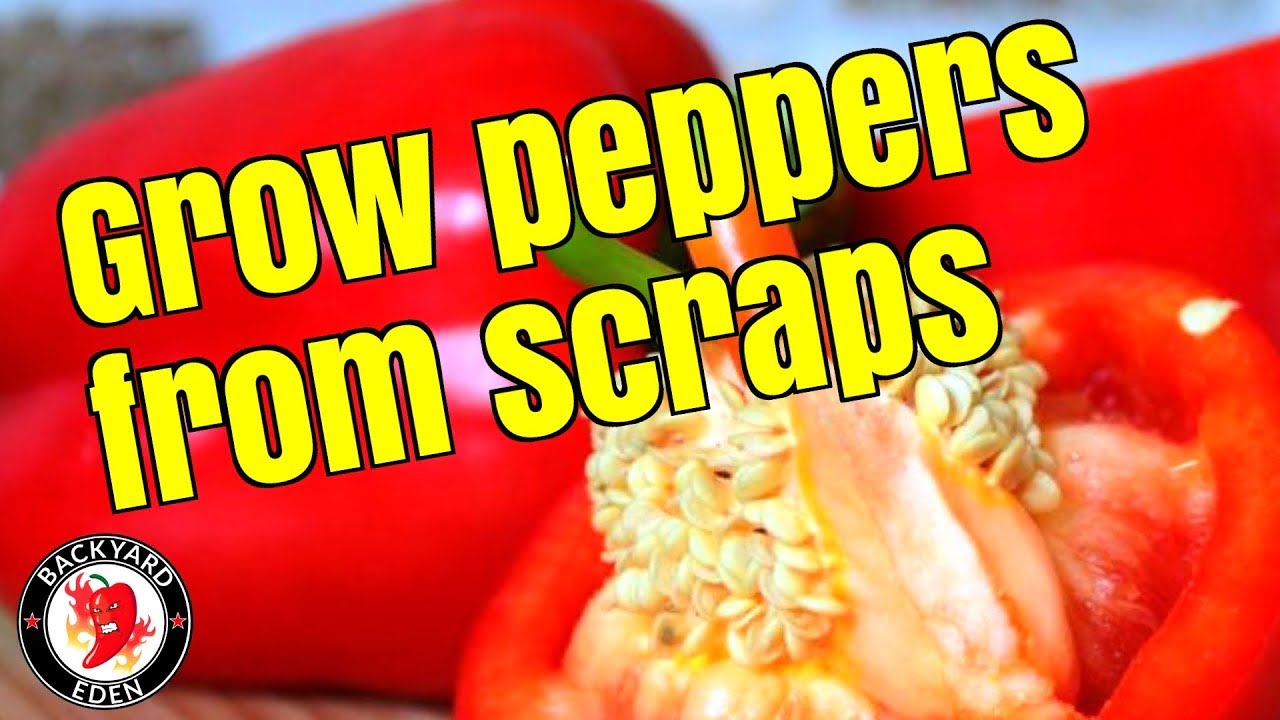
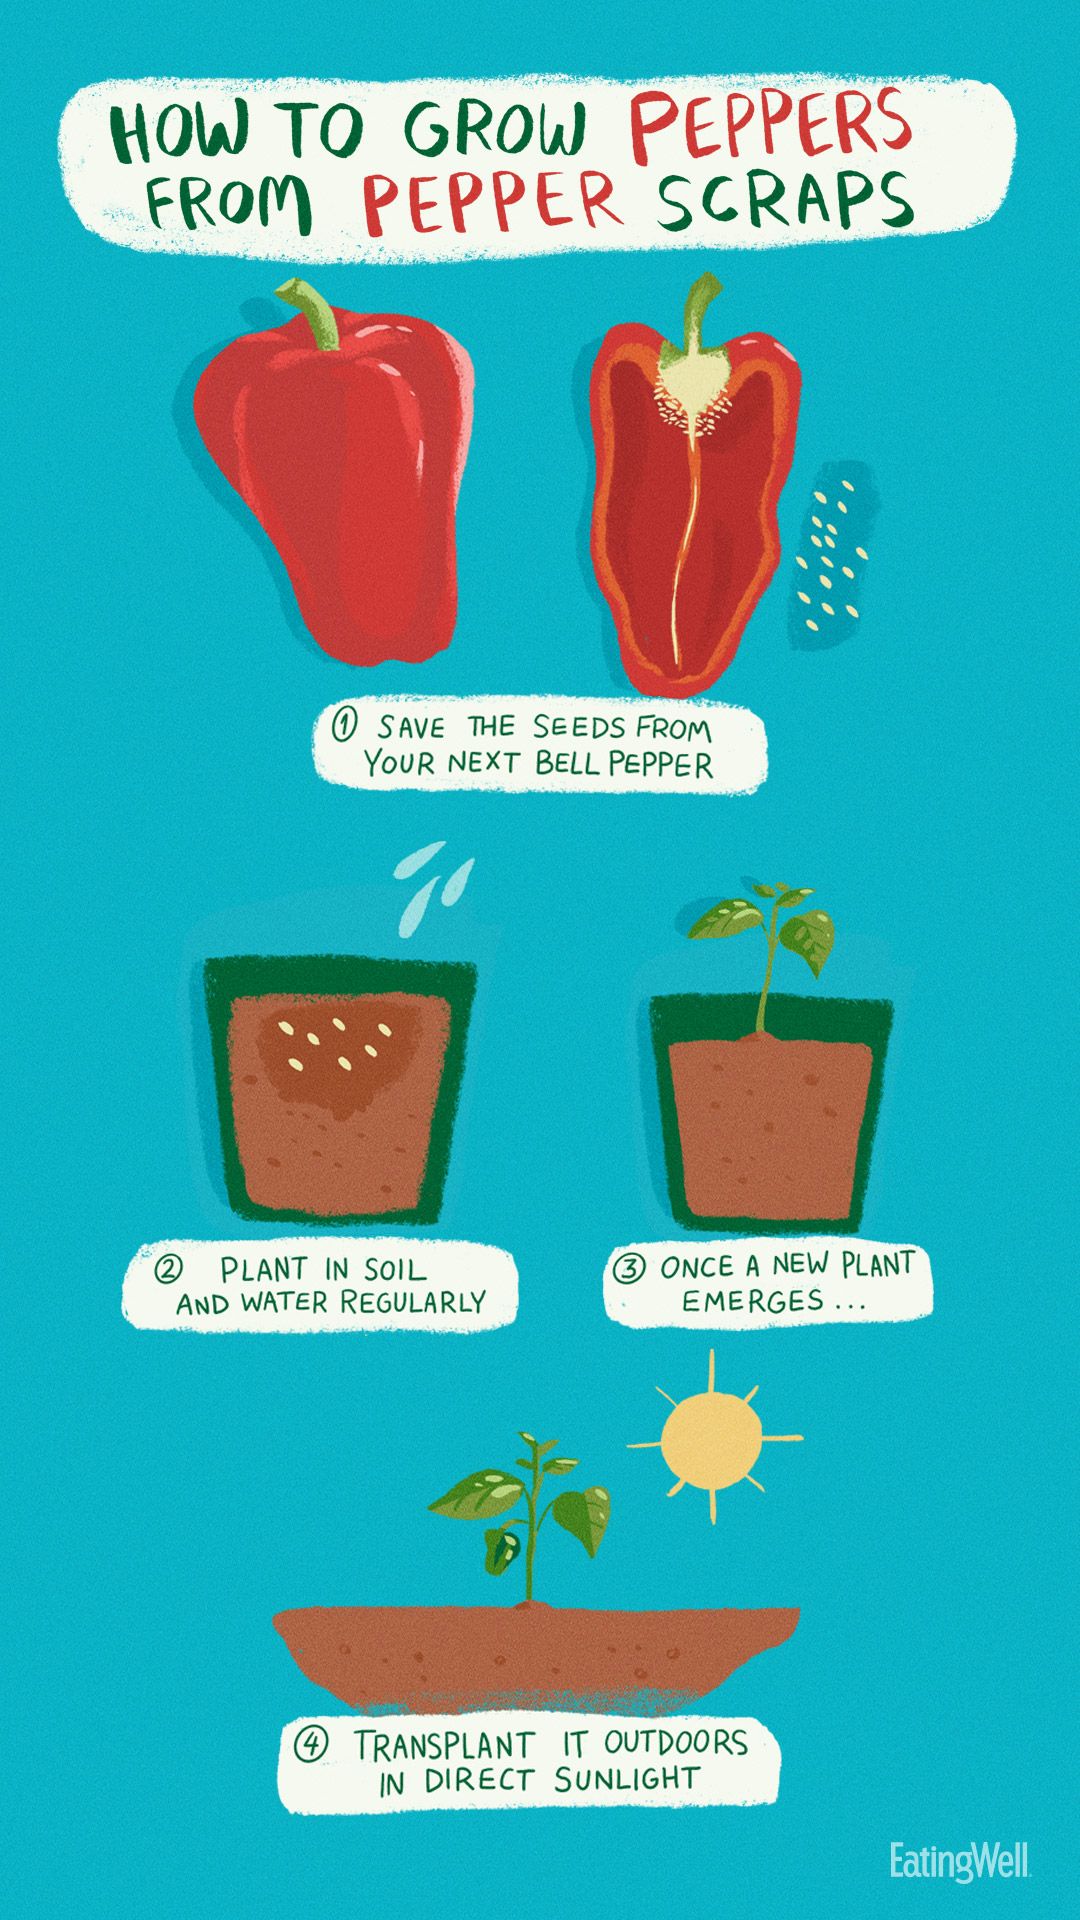
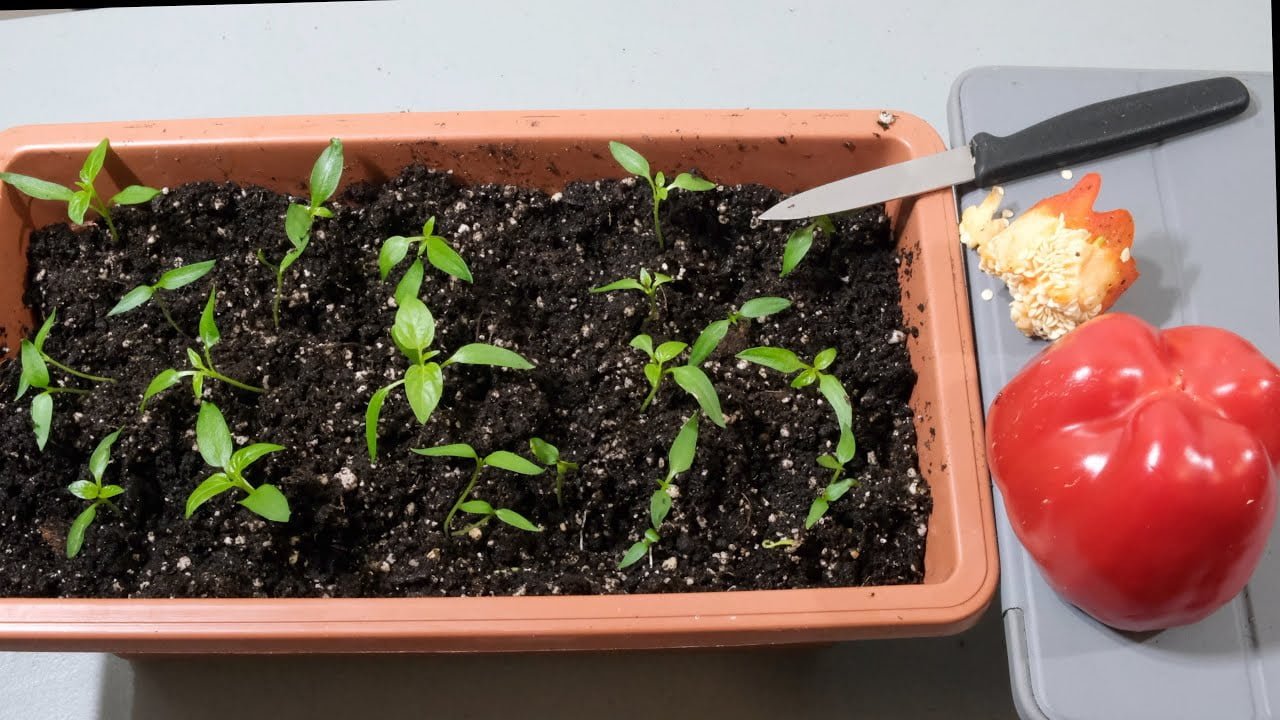
Once you have chosen your bell pepper scraps, it’s time to prepare them for planting. Start by carefully cutting off the top of the pepper, just above the stem. This top part is where the seeds are located. Take a moment to clean any remaining flesh and seeds from the top of the pepper. Then, using a gentle stream of water or a small bowl of water, rinse the seeds to remove any remaining pulp.
Once the seeds are clean, pat them dry using a paper towel. It’s important to ensure that the seeds are completely dry before moving on to the germination process. Wet seeds can lead to mold or rot, which will hinder successful germination. Once the seeds are dry, you’re ready to move on to the next step in the process.
Germinating Bell Pepper Seeds
Extracting Seeds from the Bell Pepper
Extracting the seeds from the bell pepper scraps is a relatively simple process. Take the cleaned and dry top part of the pepper and gently break it open to reveal the seeds inside. You may find some seeds still attached to bits of flesh, so carefully separate them and remove any remaining debris.
Preparing Seeds for Germination
After extracting the seeds from the bell pepper scraps, it’s important to prepare them for germination. Start by placing the seeds on a damp paper towel or cloth, making sure they are evenly spaced and not touching each other. Fold the towel or cloth over the seeds and gently press down to ensure good contact between the seeds and the moist surface.
To help retain moisture, you can place the towel or cloth with the seeds inside a sealed plastic bag or container. This will create a mini greenhouse effect, providing the optimal conditions for germination.
Germination Methods
There are a few different methods you can use for germinating bell pepper seeds. One common method is the paper towel method, as described above. Another method is to plant the seeds directly in a seed tray or small pots filled with potting soil. Make sure the soil is moist but not overly wet.
Alternatively, you can use peat pellets or seed starting kits, which provide a controlled environment for germination. These kits usually come with trays, pellets or compartments for planting the seeds, and a clear cover to retain moisture. Follow the instructions provided with the kit for the best results.
Planting Bell Pepper Seeds
Preparing the Planting Container
Before planting your germinated bell pepper seeds, you need to prepare a suitable container. Depending on your preference, you can choose to plant the seeds in individual pots, seed trays, or even recycled containers such as egg cartons or yogurt cups.
Make sure the container has drainage holes at the bottom to prevent waterlogged soil. Fill the container with well-draining potting soil that is rich in organic matter. Smooth the soil surface, ensuring it is level and free from any large clumps or debris.
Sowing the Bell Pepper Seeds
With the planting container prepared, it’s time to sow your germinated bell pepper seeds. Gently place the seeds on the soil surface, spacing them evenly and leaving some space between each seed. The recommended spacing can vary depending on the bell pepper variety, so consult the seed packet or do some research specific to the variety you are growing.
Cover the seeds with a layer of soil, about ¼ to ½ inch deep. Lightly press down on the soil to ensure good seed-to-soil contact, but be careful not to compact the soil too much. Water the newly planted seeds gently, using a misting spray or by pouring water slowly to avoid disturbing the seeds.
Providing Optimal Growing Conditions
To ensure successful growth, it’s important to provide optimal growing conditions for your bell pepper seeds. Place the planting container in a warm location, such as a sunny windowsill or a greenhouse. Bell peppers thrive in temperatures between 70-85°F (21-29°C), so try to maintain these temperatures throughout the germination and growth stages.
Keep the soil consistently moist but not soaked. Too much water can lead to root rot, while too little water can inhibit germination and growth. Monitor the moisture levels daily and adjust your watering accordingly.
Caring for Bell Pepper Seedlings
Watering the Seedlings
Once your bell pepper seedlings have emerged from the soil, it’s crucial to maintain proper watering practices. Water the seedlings deeply, ensuring that the water reaches the root zone. Allow the soil to dry out slightly between watering to prevent overwatering.
Avoid overhead watering, as wetting the leaves can create conditions for fungal diseases. Instead, direct the water at the base of the seedlings, preferably using a drip or soaker hose. This will ensure efficient water uptake and minimize the risk of disease.
Providing Adequate Sunlight
Bell peppers require ample sunlight to grow and thrive. Place your seedlings in a location that receives at least 6-8 hours of direct sunlight each day. If you are growing them indoors, use grow lights to provide the necessary light intensity.
If your seedlings are not receiving enough sunlight, they may become leggy or weak. If you notice this happening, consider relocating them to a sunnier spot or providing supplemental lighting.
Managing Temperature and Humidity
Maintaining optimal temperature and humidity levels is essential for the growth and development of bell pepper seedlings. Aim to keep the temperature between 70-85°F (21-29°C) during the day and slightly cooler at night. Fluctuations in temperature can stress the seedlings, affecting their growth and overall health.
Humidity is also important, especially during the initial stages of growth. To create a humid environment, you can cover the seedlings with a cloche or place them in a mini greenhouse. This will help to retain moisture and promote healthy growth.
Fertilizing the Seedlings
As your bell pepper seedlings continue to grow, they will require additional nutrients to support their development. Begin fertilizing the seedlings with a diluted, balanced liquid fertilizer once they have established a few sets of true leaves. Follow the instructions provided by the manufacturer for the appropriate dilution rate.
Apply the fertilizer every two to three weeks, using a gentle watering can or spray bottle to avoid over-feeding. Be careful not to apply too much fertilizer, as this can cause fertilizer burn or nutrient imbalances. Always water the seedlings before applying fertilizer to prevent root damage.
Supporting the Growing Plants
As your bell pepper plants grow taller and produce fruit, they may become top-heavy and require support. Use stakes or cages to provide support and prevent the plants from toppling over. Be gentle when securing the plants to avoid damaging the stems or roots.
Supporting the plants not only ensures their stability but also promotes better air circulation and sunlight exposure, which can help prevent disease and improve fruit production.
Transplanting Bell Pepper Seedlings
Determining the Right Time to Transplant
Transplanting your bell pepper seedlings into the garden or larger containers should be done when the seedlings have grown to a size suitable for transplanting. The seedlings should have developed a sturdy stem and a good set of leaves. Aim for a height of about 6-8 inches (15-20 cm) before transplanting.
Additionally, it’s essential to consider the weather and soil conditions. Wait until all risk of frost has passed, and the soil has warmed up to at least 60°F (15°C). Transplanting too early can stunt the growth of the seedlings and even kill them.
Choosing the Transplant Location
Selecting the right location for transplanting your bell pepper seedlings is crucial to their success. Choose a spot in your garden that receives full sun, as bell peppers thrive in warm and sunny conditions. Ensure that the soil is well-draining and fertile, enriched with organic matter.
If you are growing bell peppers in containers, choose a container that is at least 12 inches (30 cm) deep and wide. Select a container with adequate drainage holes to prevent waterlogging.
Preparing the Transplant Area
Prepare the transplant area by clearing away any weeds or debris. Loosen the soil in the planting area, incorporating compost or well-rotted organic matter to improve its fertility and structure. Bell peppers prefer a slightly acidic soil with a pH range between 6.0-6.8.
Transplanting the Seedlings
To transplant your bell pepper seedlings, start by digging a hole slightly larger than the root ball of the seedling. Gently lift the seedling from its container, being careful to disturb the roots as little as possible. Place the seedling in the hole, making sure it is planted at the same depth it was growing in the original container.
Backfill the hole with soil, gently firming it around the base of the seedling to provide stability. Water the transplanted seedlings thoroughly to help settle the soil and reduce transplant shock.
Maintaining Bell Pepper Plants
Watering and Irrigation
Proper watering is crucial for the health and productivity of bell pepper plants. Water the plants deeply and thoroughly, aiming to keep the soil evenly moist but not saturated. Inconsistent watering, either over or under-watering, can lead to various problems such as blossom end rot or fruit cracking.
To prevent fungal diseases, it’s important to avoid wetting the leaves when watering. Use a soaker hose or drip irrigation system to deliver water directly to the base of the plants.
Mulching the Soil
Mulching around your bell pepper plants can provide numerous benefits. Apply a layer of organic mulch such as straw, shredded leaves, or grass clippings around the plants to help retain soil moisture, suppress weed growth, and regulate soil temperature. Mulching also acts as a physical barrier, protecting the fruit from direct contact with the soil.
Pruning and Harvesting
Pruning bell pepper plants is not necessary, but it can help promote better air circulation and reduce the risk of disease. If you choose to prune, focus on removing any damaged or diseased leaves and suckers that emerge from the leaf axils. Be careful not to remove too much foliage, as the leaves are crucial for photosynthesis and fruit development.
When it comes to harvesting bell peppers, wait until the fruits have reached their desired color and size. Bell peppers can be harvested at different stages, from green to fully ripe. Use a sharp knife or scissors to cut the peppers from the stem, taking care not to damage the plant or other fruits. Harvesting regularly encourages the plant to produce more fruits.
Managing Pests and Diseases
Bell peppers can be susceptible to various pests and diseases, so vigilance is key to preventing and managing these issues. Common pests include aphids, spider mites, and flea beetles, while diseases such as bacterial spot, powdery mildew, and blossom end rot can affect the plants.
To deter pests, employ organic methods such as companion planting, using insecticidal soaps or neem oil, and regular inspection for early detection. Proper sanitation, good airflow, and avoiding over-fertilization can help prevent disease outbreaks. If necessary, consult with local gardening resources or professionals for appropriate pest and disease management techniques.
Common Problems and Troubleshooting
Stunted Growth or Yellowing Leaves
Stunted growth or yellowing leaves in bell pepper plants can be caused by various factors. Lack of sunlight, nutrient deficiencies, over or under-watering, and pest or disease infestations can all contribute to these issues.
Ensure that your bell pepper plants are receiving adequate sunlight, water, and nutrients. Avoid over-fertilizing, as this can lead to nutrient imbalances. Address any pest or disease problems promptly, using appropriate organic methods.
Blossom Drop or Poor Fruit Set
Blossom drop or poor fruit set is a common problem in bell pepper plants. Insufficient pollination, extreme temperatures, inadequate moisture, and nutrient imbalances can all contribute to this issue.
To encourage pollination, gently shake the plants or use a small paintbrush to transfer pollen between flowers. Ensure that the plants are receiving consistent moisture, especially during flowering and fruit set. Maintain optimal temperature and humidity levels, and ensure that the plants are receiving adequate nutrients through regular fertilization.
Pest Infestations
Pest infestations can be a major challenge when growing bell peppers. Aphids, spider mites, flea beetles, and other pests can damage the foliage and affect fruit production.
Regularly inspect your plants for signs of infestation, such as distorted leaves, webbing, or small holes. Introduce beneficial insects like ladybugs or lacewings to control pest populations naturally. If necessary, use organic insecticidal soaps, neem oil, or other appropriate methods to manage pest infestations.
Disease Identification and Management
Bell pepper plants can be susceptible to various diseases such as bacterial spot, powdery mildew, and blossom end rot. These diseases can cause leaf spots, powdery or fuzzy growth on the leaves, and rotting at the blossom end of the fruit.
Monitor your plants regularly for any signs of disease. If you notice any symptoms, promptly remove and dispose of infected plant parts. To prevent disease spread, avoid overhead watering and improve air circulation around the plants. Organic fungicides may be used as a last resort if other management strategies are not effective.
Harvesting and Using Bell Peppers
Determining the Right Time to Harvest
Determining the right time to harvest bell peppers depends on your desired stage of ripeness and the specific variety you are growing. Generally, bell peppers can be harvested when they have reached their mature color, such as green, yellow, red, or even purple.
It’s essential to avoid harvesting bell peppers too early to allow for optimal flavor and sweetness. Check the specific recommendations for the variety you are growing, as some peppers change color as they mature.
Harvesting Bell Peppers
When harvesting bell peppers, use a sharp knife or scissors to cut the peppers from the stem, taking care not to damage the plant or other fruits. Gently twist the pepper if necessary to detach it from the stem. Avoid pulling or tugging on the fruit, as this can damage the plant and reduce future yields.
Handle the harvested peppers carefully to avoid bruising or damaging the fruit. Place them in a basket or container, ensuring that they are not stacked or crushed. Handle them gently during transportation to prevent bruising.
Storing and Preserving Bell Peppers
To store bell peppers, it’s best to keep them in a cool and dry place, such as a refrigerator. Place the peppers in a perforated plastic bag or wrap them in paper towels to absorb excess moisture.
You can also preserve bell peppers by freezing or canning them. Freezing is a convenient method that allows you to enjoy bell peppers throughout the year. Wash, core, and cut the peppers into desired shapes before blanching them in boiling water for a couple of minutes. Then, drain and cool the peppers before packing them in airtight containers or freezer bags.
Canning bell peppers in vinegar or a brine solution is another option for long-term preservation. Follow proper canning procedures and consult reliable resources for detailed instructions on canning techniques.
Recipes and Ideas for Culinary Uses
Bell peppers are versatile ingredients that can be used in a variety of culinary dishes. From stir-fries and salads to stuffed peppers and roasted peppers, there are countless ways to enjoy the flavors and textures of bell peppers.
For a refreshing summer salad, combine thinly sliced bell peppers with cucumbers, cherry tomatoes, and fresh herbs. Drizzle with a simple vinaigrette and serve chilled. In stir-fries and pasta dishes, bell peppers add vibrant colors and a satisfying crunch. Don’t forget to experiment with different cooking methods and flavor combinations to discover your favorite ways to use bell peppers in the kitchen.
Final Tips and Recommendations
Considerations for Growing Bell Peppers in Containers
If you are limited on space or looking to grow bell peppers in containers, there are a few additional considerations to keep in mind. Choose compact or dwarf varieties that are well-suited for container gardening. Ensure that the container is large enough to accommodate the root system and provides adequate drainage.
Use a high-quality potting mix that is lightweight, well-draining, and rich in organic matter. Water the container-grown peppers more frequently, as the soil in containers tends to dry out faster. Fertilize regularly to provide sufficient nutrients since container plants may deplete the soil more quickly.
Succession Planting and Extended Harvest
To enjoy a continuous supply of bell peppers, consider succession planting. This involves planting new seeds or transplants every few weeks, ensuring a staggered harvest throughout the growing season. By planting in succession, you can extend your harvest and have a steady supply of fresh bell peppers.
Experimenting with Different Pepper Varieties
While bell peppers are a popular choice for many gardeners, there are numerous pepper varieties to explore. Consider experimenting with different types such as hot peppers, sweet peppers, or even exotic pepper varieties. Each pepper variety has its unique flavor, heat level, and culinary uses, adding excitement and diversity to your garden and kitchen.
Conclusion
Growing bell peppers from scraps is a rewarding and cost-effective way to enjoy fresh, homegrown produce. From selecting the right scraps, germinating the seeds, caring for the seedlings, and harvesting the peppers, each stage of the process contributes to the joy of growing your own bell peppers. With proper care and attention, you can successfully cultivate bell peppers from scraps and savor the flavors of your labor in a variety of culinary dishes. So go ahead and give it a try – you’ll be amazed at the journey from scraps to delicious peppers!
