Are you interested in growing your own fresh and delicious acorn squash? Look no further! In this informative guide, you will discover the step-by-step process of successfully cultivating acorn squash in your own backyard. From selecting the right seeds to nurturing the plants and harvesting the bounty, this article will provide you with all the necessary tips and tricks to ensure a thriving squash harvest. Get ready to enjoy the satisfaction of growing your own nutritious and flavorful acorn squash with this comprehensive guide.

Choosing the Right Variety of Acorn Squash
When it comes to growing acorn squash, choosing the right variety is crucial for a successful harvest. There are several types of acorn squash to choose from, each with its own unique qualities. The preferred variety depends on your personal preferences and the specific growing conditions in your area.
Determining the Preferred Acorn Squash Variety
To determine the preferred acorn squash variety, consider factors such as taste, texture, and color. Some popular varieties include ‘Table King,’ ‘Sweet Reba,’ and ‘Golden Acorn.’ ‘Table King’ is known for its sweet and nutty flavor, while ‘Sweet Reba’ offers a smooth and creamy texture. ‘Golden Acorn’ stands out with its vibrant yellow color.
It’s also essential to consider the size of the acorn squash variety you prefer. Some varieties, like ‘Bush Table Queen,’ produce smaller fruits, making them ideal for those with limited space in their garden. Others, such as ‘Tay-Berry’, produce larger fruits, perfect for those who want a plentiful harvest.
Considerations for Different Climate Zones
Another important factor to consider when choosing an acorn squash variety is the climate zone you live in. Different varieties have varying susceptibility to cold or heat, so it’s essential to select one that is well-suited to your local climate.
If you live in a cooler climate, consider varieties like ‘Frostbite’ or ‘Bonbon,’ which have a shorter growing season and can tolerate lower temperatures. On the other hand, if you live in a warmer climate, ‘Sweet Reba’ or ‘Table Gold’ may be better options as they are more heat-tolerant.
Purchasing High-Quality Acorn Squash Seeds
To ensure a successful harvest, it’s crucial to start with high-quality acorn squash seeds. When purchasing seeds, look for heirloom or organic varieties, as these are often more reliable and produce better-tasting squash.
You can find a wide variety of acorn squash seeds at local gardening stores or online seed suppliers. It’s advisable to read reviews and check the credibility of the seller before making a purchase. Additionally, consider supporting local seed companies or farmers who specialize in squash varieties adapted to your region.
Preparing the Growing Area
Creating the right growing conditions for acorn squash is vital for the plants‘ health and productivity. Proper preparation of the growing area ensures that the soil is fertile, well-drained, and free of weeds, providing the squash plants with an optimal environment to thrive.
Selecting a Suitable Site for Planting
When selecting a site for planting acorn squash, choose an area that receives full sun exposure for at least six to eight hours per day. Squash plants thrive in warm temperatures, so it’s crucial to provide them with ample sunlight.
Additionally, ensure that the chosen site has well-draining soil. Acorn squash plants are susceptible to root rot and other diseases if their roots are constantly saturated. If your soil tends to retain water, consider building raised beds or mounds to improve drainage.
Testing and Improving the Soil
Before planting, it’s essential to test the soil’s quality and fertility. Acorn squash plants prefer well-drained soil with a pH level between 6.0 and 7.0. You can purchase a soil testing kit or send a soil sample to a local agricultural extension office for analysis.
Based on the soil test results, you may need to amend the soil to provide the necessary nutrients. Incorporating organic matter, such as compost or well-rotted manure, into the soil improves its fertility and structure. Additionally, adding organic amendments can enhance water retention and microbial activity, promoting healthy root development.
Clearing the Area from Weeds and Debris
Before planting acorn squash seeds, it’s crucial to clear the growing area from weeds and debris. Weeds can compete with squash plants for nutrients, water, and sunlight, hindering their growth. Clearing the area also helps prevent diseases and pests from taking hold.
Remove any existing weeds or grass by hand, making sure to remove the roots to prevent regrowth. Rake away fallen leaves, twigs, and other debris to create a clean planting area. This will provide the acorn squash plants with a fresh start and reduce the risk of pests and diseases.
Planting Acorn Squash Seeds
Once you have prepared the growing area, it’s time to plant the acorn squash seeds. Whether sowing the seeds indoors or directly in the garden, following the proper planting techniques ensures a successful start for your squash plants.
Determining the Optimal Planting Time
The optimal planting time for acorn squash seeds depends on your specific climate and the average date of the last frost in your area. Acorn squash is a warm-season crop, and the seeds require soil temperatures between 60°F and 105°F (15°C to 40°C) to germinate successfully.
In most regions, acorn squash can be directly sown in the garden once the threat of frost has passed and the soil has warmed up. However, in colder climates with shorter growing seasons, starting the seeds indoors a few weeks before the last frost date can give the plants a head start.
Sowing Seeds Indoors
To sow acorn squash seeds indoors, fill seed trays or containers with seed-starting mix. Plant one or two seeds per container, placing them about an inch deep. Place the containers in a warm location, ideally around 80°F (27°C), to encourage germination.
Keep the soil consistently moist but not waterlogged. Once the seedlings have emerged, thin them, keeping the strongest and healthiest one in each container. After the danger of frost has passed and the seedlings have developed a couple of true leaves, they can be transplanted into the garden.
Direct Sowing in the Garden
For gardeners with longer growing seasons or mild climates, direct sowing acorn squash seeds in the garden is a popular method. To plant the seeds, create small holes in the soil, spaced about 3 to 5 feet apart, and about an inch deep.
Place two or three seeds in each hole and cover them with soil. Water the area thoroughly to ensure good seed-to-soil contact. As the seedlings emerge and grow, thin them to maintain one healthy plant per hole.
Providing the Ideal Growing Conditions
Acorn squash plants require specific conditions for optimal growth and productivity. From proper irrigation and nutrient levels to mulching and protecting against cold weather, providing the ideal growing conditions ensures healthy and vigorous plants.
Applying Proper Irrigation
Consistent and adequate watering is crucial for acorn squash plants, especially during the flowering and fruiting stages. While they require consistent moisture, it’s important not to overwater the plants, as this can lead to root rot and other diseases.
Monitor soil moisture levels regularly and aim to keep the soil evenly moist, but not waterlogged. Water the plants deeply, allowing the soil to dry slightly between watering sessions. Additionally, it’s beneficial to water the plants at the base, keeping the foliage dry to prevent fungal diseases.
Maintaining Adequate Nutrient Levels
Acorn squash plants have high nutrient requirements, especially during their rapid growth phase. To ensure strong and productive plants, it’s essential to provide them with an adequate supply of essential nutrients.
Before planting, incorporate a balanced organic fertilizer or compost into the soil to enrich its nutrient content. During the growing season, periodic applications of a balanced organic fertilizer helps replenish nutrients that the plants utilize.
Monitor the plants for any signs of nutrient deficiencies, such as yellowing leaves or stunted growth. If deficiencies are present, adjust the nutrient program accordingly, providing the plants with the necessary elements to thrive.
Mulching to Control Weeds and Moisture
Mulching is an effective technique for controlling weeds and conserving soil moisture in the garden. By applying a layer of organic mulch around the base of acorn squash plants, you can suppress weed growth and retain moisture in the soil.
Use organic materials such as straw, wood chips, or shredded leaves as mulch. Apply a layer about 2 to 3 inches thick, ensuring it doesn’t touch the plant stems to prevent rot. The mulch acts as a barrier, preventing weed seeds from germinating and competing with the squash plants.
Protecting Plants from Cold Weather
Acorn squash is a warm-season crop, and cold weather can pose a threat to its growth and fruit production. If you live in an area with cooler temperatures, it’s important to protect your squash plants from frost and cold snaps.
Covering the plants with row covers or frost blankets can help shield them from chilly winds and frost. These covers create a microclimate around the plants, trapping the heat and protecting them from low temperatures. Ensure the covers are properly secured to prevent them from blowing away during strong winds.

Supporting and Training Acorn Squash Plants
As acorn squash plants grow, they develop long and sprawling vines that may require support or training. By providing proper support structures and training the vines, you can maximize space utilization and prevent damage to the plants and fruits.
Installing Sturdy Support Structures
Acorn squash vines can become heavy, especially when laden with fruits. To support the weight of the vines and prevent them from becoming tangled or breaking, it’s important to install sturdy support structures.
One common method is to use trellises or fences made of wire or stakes. Place the support structures near the plants at the time of planting, ensuring they are securely anchored in the ground. As the vines grow, gently train them to climb the support structures, using twine or soft ties to secure them as needed.
Properly Training Vines and Shoots
Training the vines and shoots of acorn squash plants ensures they grow in an organized and manageable manner. Regularly redirecting the vines and shoots prevents them from sprawling too far, saving space in the garden and facilitating better air circulation.
As the plants grow, gently guide the young vines towards the support structures, weaving them through the trellis or fence. Remove any side shoots that emerge from the main stem, directing the plant’s energy towards fruit production. Be careful not to damage the vines or leaves during the training process, as this may lead to disease or reduced productivity.
Addressing Common Pests and Diseases
Like any other crop, acorn squash plants are susceptible to pests and diseases. Identifying and managing common pests, as well as taking preventive measures against diseases, is essential for maintaining healthy and productive plants.
Identifying and Managing Common Pests
Acorn squash plants can fall victim to various pests, including squash bugs, cucumber beetles, and vine borers. Squash bugs and cucumber beetles feed on the leaves and stems, while vine borers attack the base of the plant.
Regularly inspect the plants for signs of pest activity, such as chewed leaves, wilting, or the presence of eggs on the undersides of leaves. Handpicking pests can effectively control small infestations. For larger infestations, consider using organic insecticides or botanical controls specifically labeled for squash plants.
Preventing and Treating Diseases
Acorn squash plants are susceptible to fungal diseases such as powdery mildew and downy mildew. Powdery mildew appears as a white or grayish powdery coating on the leaves, while downy mildew causes yellowing and brown patches on the foliage.
To prevent fungal diseases, provide proper air circulation by spacing the plants adequately and removing any excessive foliage. Avoid overhead watering, as this can increase humidity levels and promote disease development. If diseases do occur, promptly remove and dispose of any infected plant material and treat the plants with a suitable organic fungicide.

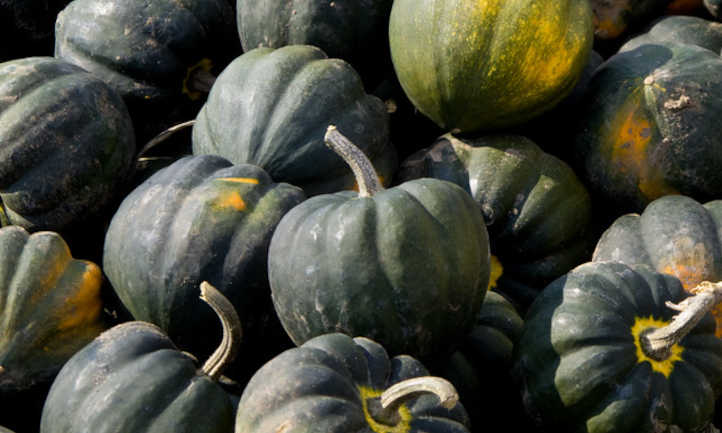
Harvesting and Storing Acorn Squash
One of the most exciting parts of growing acorn squash is the harvest. Knowing when and how to harvest the squash ensures that you enjoy them at their peak quality and flavor. Proper storage techniques also extend their shelf life, allowing you to enjoy the harvest even after the growing season has ended.
Determining the Optimal Harvest Time
The optimal harvest time for acorn squash depends on the variety and personal preference. Generally, acorn squash is ready for harvest when the rind is hard and cannot be easily punctured with a fingernail. The skin should have a deep, even color and be free from blemishes or cracks.
It’s important to harvest the squash before the first frost, as cold temperatures can damage the fruits. Regularly monitor the plants and harvest the acorn squash when they are mature but still have a vibrant color and firm texture.
Harvesting Squash in a Correct Manner
To harvest acorn squash, use a sharp knife or pruning shears to cut the fruit from the vine, leaving a short stem attached. Avoid twisting or pulling the squash from the vine, as this can damage the plant.
Handle the harvested squash with care, as they can be easily bruised or damaged. Place them in a basket or box lined with a soft material, such as straw or newspaper, to prevent bruising during transportation.
Properly Storing Acorn Squash
Acorn squash can be stored for several weeks if properly prepared and stored in the right conditions. Before storage, it’s crucial to cure the squash to improve its flavor and extend its shelf life. To cure the squash, place them in a warm, dry area, such as a sunny windowsill or porch, for about a week.
After curing, store the acorn squash in a cool, dry place with good air circulation. Ideal storage locations include a root cellar, basement, or pantry. Keep the squash off the ground and prevent them from touching to minimize the risk of rot and extend their storage life. Check the squash regularly for any signs of decay and promptly use any that show signs of spoilage.
Utilizing Acorn Squash in Culinary Delights
Once you’ve harvested and stored your acorn squash, it’s time to explore the endless culinary possibilities. Acorn squash is incredibly versatile and can be used in a variety of delicious recipes.
Exploring Various Cooking Methods
Acorn squash can be baked, roasted, steamed, stuffed, or even used in soups and stews. Baking or roasting acorn squash brings out its natural sweetness and creates a soft and creamy texture. For a simple preparation, cut the squash in half, scoop out the seeds, and bake it in the oven until tender. Add a touch of butter, maple syrup, or honey for a delightful flavor boost.
Steaming is another popular method for cooking acorn squash. Cut the squash into cubes or slices and steam them until tender. Steamed acorn squash can be added to salads, stir-fries, or enjoyed as a side dish.
Delicious Recipes to Try
If you’re looking to get creative in the kitchen, there are countless delicious recipes to try with acorn squash. One popular dish is stuffed acorn squash, which involves filling the hollowed-out squash halves with a flavorful mixture of grains, veggies, and herbs, and baking them until tender.
Acorn squash soup is another delectable option. Blending roasted acorn squash with vegetable or chicken broth creates a creamy and comforting soup perfect for chilly evenings. Add spices like cinnamon, nutmeg, or ginger to enhance the flavor profile.
Acorn squash can also be used as a base for wholesome salads. Roast slices of acorn squash and combine them with fresh greens, nuts, cheese, and a zesty dressing for a satisfying and nutritious meal.

Saving Seeds for Future Planting
To continue growing acorn squash in future growing seasons, you can save the seeds from the current harvest. Saving seeds allows you to select the best fruits for saving, ensuring that the future plants exhibit the desired characteristics.
How to Select, Clean, and Store Acorn Squash Seeds
To save acorn squash seeds, choose fully ripe and healthy fruits. Cut the squash open and remove the seeds, placing them in a colander or fine-mesh strainer. Rinse the seeds thoroughly, removing any residual pulp or flesh.
Spread the cleaned seeds in a single layer on a flat surface, such as a paper towel or a plate, and allow them to air dry for about a week. Once completely dry, store the seeds in a cool, dry place, such as an airtight container or a paper envelope. Label the container with the variety and date for future reference.
Properly stored acorn squash seeds can remain viable for up to five years. However, it’s essential to periodically check the seeds for viability before planting them in subsequent seasons.
Extending the Growing Season
If you want to prolong your acorn squash harvest or live in a region with a short growing season, there are methods to extend the growing season and increase your chances of a bountiful harvest.
Using Season Extension Techniques
Season extension techniques, such as using cold frames, row covers, or hoop houses, can protect your acorn squash plants from cold temperatures and frost. By creating a microclimate around the plants, these structures trap heat and provide a few extra weeks of growing time in the fall.
Cold frames are transparent structures that can be used to cover the squash plants, allowing sunlight to penetrate while protecting them from cold winds. Row covers, made of lightweight fabric, can be draped over the plants and secured in place using stakes or clips. Hoop houses consist of a series of plastic-covered hoops that create a tunnel-like structure over the plants.
Growing Acorn Squash in Containers
If you have limited garden space or live in an urban area, growing acorn squash in containers is a viable option. Select a large container with a minimum size of 5 gallons to provide enough space for the roots to grow.
Fill the container with well-draining potting mix and plant one or two acorn squash seeds per container. Place the container in a sunny location and provide regular water and nutrients. Remember to choose a compact variety that is well-suited for container gardening, such as ‘Bush Table Queen.’
Container-grown acorn squash plants may require additional attention and care, as they are more exposed to environmental fluctuations. Regularly monitor soil moisture levels and adjust watering accordingly. Additionally, provide support structures, such as stakes or trellises, to support the vines as they grow.
By following these comprehensive steps and providing the ideal growing conditions, you can successfully grow and enjoy a bountiful harvest of delicious acorn squash. Whether you’re a seasoned gardener or new to growing your own food, the satisfaction of growing and harvesting your own acorn squash is truly rewarding. So roll up your sleeves, get your gardening tools ready, and embark on an exciting journey of growing your own acorn squash. Happy gardening!


