So, you have a surplus of fresh carrots and you’re wondering what to do with them before they go bad. Luckily, freezing and drying carrots are two great options to help preserve their flavor and nutrients. In this step-by-step guide, we will walk you through the easy process of freezing and drying carrots, ensuring that you can enjoy their deliciousness all year round. Get ready to become a pro at preserving carrots in just a few simple steps!

Preparing Carrots for Freezing and Drying
Carrots are not only delicious and versatile, but they are also packed with essential nutrients and vitamins. Whether you have an abundant harvest from your garden or you found a great deal on fresh carrots at the store, preparing them for freezing or drying is a fantastic way to preserve their freshness and extend their shelf life. In this guide, we will walk you through the steps of choosing the right carrots, washing and peeling them, and cutting them to prepare for freezing or drying.
Choosing the Right Carrots
When it comes to choosing carrots for freezing or drying, it’s important to select ones that are fresh and in optimal condition. Look for carrots that are firm, smooth, and vibrant in color. Avoid carrots that are soft, wilted, or have any signs of decay or damage. It’s also recommended to choose carrots that are relatively similar in size, as this will ensure even cooking and drying times.

Washing and Peeling the Carrots
Before you can begin the process of freezing or drying your carrots, it is crucial to wash and peel them thoroughly. Start by giving the carrots a good rinse under cool, running water to remove any dirt or debris. You can use a vegetable brush or your fingers to gently scrub the skin of the carrots. If the carrots have stubborn dirt or are not organic, peeling them may be necessary. Use a peeler to remove the outer layer, taking care to remove as little flesh as possible. Peeling the carrots will not only enhance their appearance but also ensure a more uniform texture after freezing or drying.
Cutting the Carrots
Once you have washed and peeled the carrots, it’s time to cut them into the desired size and shape. The size of the carrot pieces will determine how long they will take to freeze or dry. For freezing, it’s best to cut the carrots into slices, cubes, or sticks. Aim for pieces that are approximately 1/4 to 1/2 inch thick for even freezing. If you prefer to dry the carrots, it’s recommended to cut them into thin slices or julienne strips. The thinner the slices, the faster and more evenly they will dry.

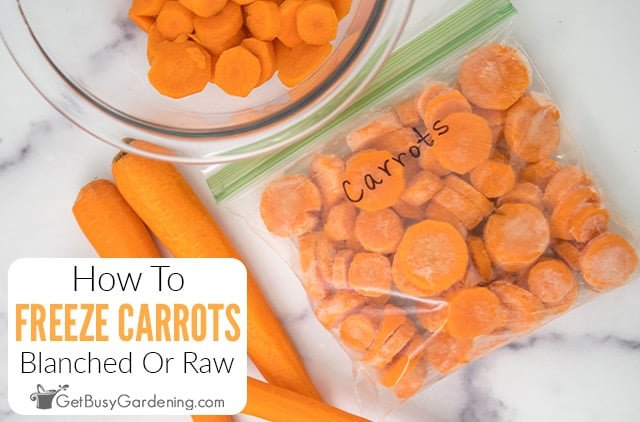
Freezing Carrots
Freezing carrots is a simple and convenient method of preserving their freshness and nutritional value. By following proper blanching and packaging techniques, you can enjoy the taste of garden-fresh carrots throughout the year.
Blanching the Carrots
Blanching is a crucial step in the freezing process as it helps to preserve the texture, color, and flavor of the carrots. To blanch the carrots, start by bringing a large pot of water to a rolling boil. Carefully add the prepared carrot pieces to the boiling water and let them cook for 2-3 minutes. This brief cooking time will help to deactivate enzymes that can cause the carrots to deteriorate during freezing. After blanching, it is essential to cool the carrots quickly.
Cooling and Packaging the Carrots
After blanching, it’s crucial to cool the carrots rapidly to stop the cooking process. To do this, transfer the blanched carrot pieces into a bowl of ice water. Let them sit in the ice water for the same amount of time they were blanched. Once the carrots are completely cool, drain them thoroughly to remove any excess water.
Next, it’s time to package the carrots for freezing. You can use freezer-safe storage bags or airtight containers specifically designed for freezing. Fill the containers with the cooled and drained carrot pieces, leaving some headspace to allow for expansion during freezing. Make sure to label the containers with the date and contents before sealing them tightly. Place the packaged carrots in the freezer, and they will be ready to use whenever you need them.
Drying Carrots
Drying carrots is an excellent option for preserving them if you prefer a longer shelf life without the need for freezing. Dehydrating carrots removes the moisture content, making them lightweight and easy to store. Here’s how you can dry your carrots:
Preparing the Carrots for Drying
After washing and peeling the carrots, it’s time to prepare them for drying. For best results, thinly slice the carrots into uniform pieces. If you prefer a different shape, julienne strips can also be cut. The key is to ensure that the carrot pieces are similar in size so that they dry evenly.
Dehydrating the Carrots
To dry the carrots, you can use either a food dehydrator or an oven set to a low temperature. If you have a dehydrator, arrange the carrot slices or strips in a single layer on the dehydrator trays. Set the temperature according to the manufacturer’s instructions, typically around 125°F (52°C). Leave the carrots in the dehydrator for several hours until they are completely dry and brittle.
If you don’t have a dehydrator, you can use an oven as an alternative. Preheat the oven to its lowest setting, usually around 140°F (60°C). Place the carrot pieces on a parchment-lined baking sheet in a single layer. Leave the oven door slightly ajar to allow air circulation. Keep a close eye on the carrots and rotate the sheets every hour or so to ensure even drying. The drying time may vary, but it typically takes 4-6 hours for the carrots to dry completely.
Storing the Dried Carrots
Once the carrots are fully dried, it’s time to store them properly to maintain their quality. Allow the carrots to cool completely before transferring them to airtight containers or glass jars with tight-fitting lids. Store the containers in a cool, dry place away from direct sunlight. Properly dried and stored carrots can last for up to a year, providing you with a nutritious and versatile ingredient for various recipes.
In conclusion, whether you choose to freeze or dry your carrots, preserving them allows you to enjoy their delicious taste and nutritional benefits long after their harvest season. By following the step-by-step guide outlined above, you can prepare your carrots for freezing or drying with confidence. So go ahead and make the most of your carrots by preserving them in a way that suits your preferences and culinary needs.