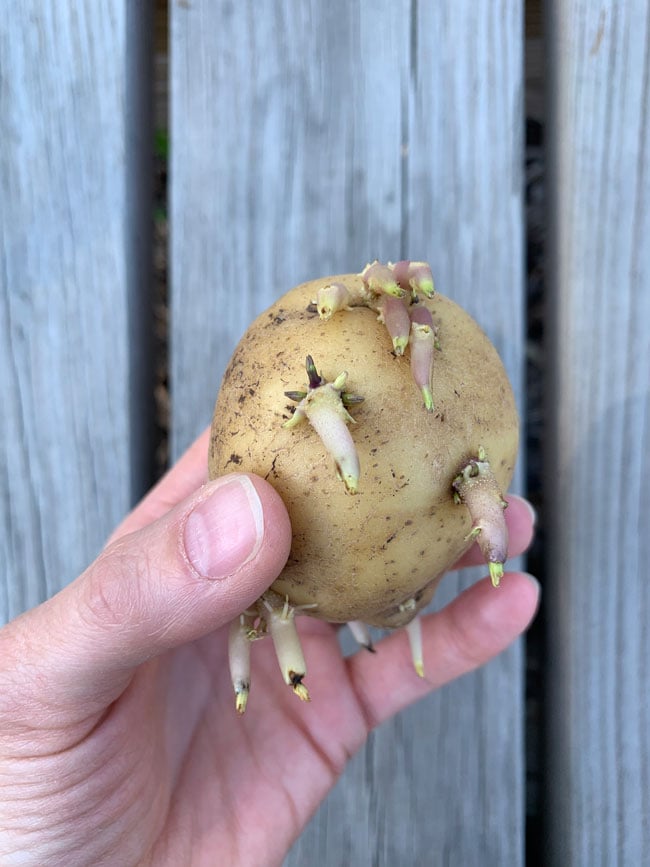
Potato cultivation has long been a significant aspect of agricultural practices across the globe, and sprouting potatoes lies at the foundation of this endeavor. In order to understand the process involved in potato sprouting, one must explore the intricacies of potato growth and the key factors that contribute to their successful sprouting. This article aims to shed light on the essential techniques and conditions necessary for sprouting potatoes, unraveling the mysteries behind this fundamental practice in potato cultivation.
Selecting Potatoes for Sprouting
Choosing the Right Potato Varieties
When selecting potatoes for sprouting, it is important to choose the right variety. Certain potato varieties are better suited for sprouting than others. Look for varieties that are known to produce strong and healthy sprouts, such as Russets, Yukon Golds, or Red Pontiacs. These varieties tend to have a higher success rate when it comes to sprouting and producing vigorous plants.
Inspecting the Potatoes
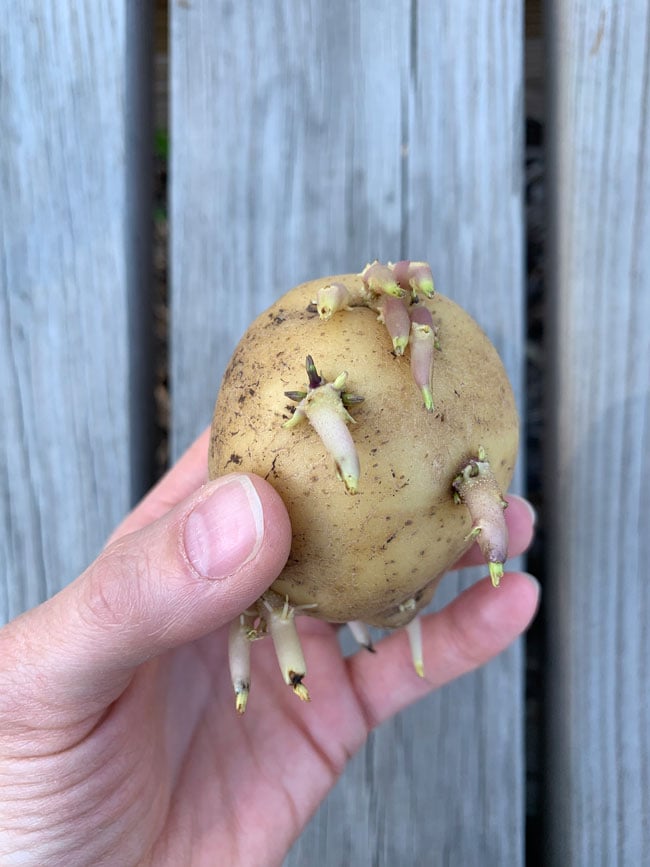
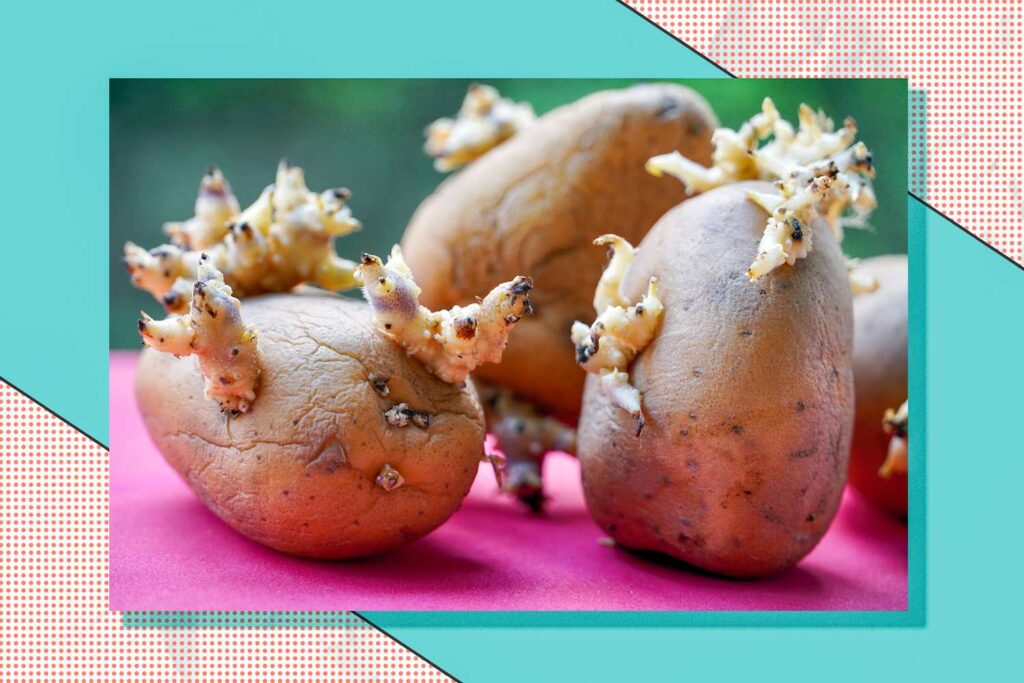
Before you begin the sprouting process, it is crucial to inspect the potatoes for any signs of damage or disease. Look for blemishes, soft spots, or wrinkled skin, as these can indicate potential issues. Avoid potatoes that have mold, rot, or sprouting growths already present, as these may not sprout effectively or can introduce diseases into your sprouting environment.
Avoiding Chemically-Treated Potatoes
Another important consideration when selecting potatoes for sprouting is to choose organically-grown or untreated potatoes. Potatoes that have been chemically treated with sprout inhibitors or pesticides can have a negative impact on the sprouting process and the health of the resulting plants. Ensure that the potatoes you choose are free from any chemical treatments to maximize the success of your sprouting endeavors.
Preparing Potatoes for Sprouting
Cleaning the Potatoes
Before you can start the sprouting process, it is necessary to clean the potatoes thoroughly. Use a soft brush or cloth to remove any dirt or debris on the surface of the potatoes. This helps prevent the introduction of harmful bacteria or fungi into the sprouting environment. Make sure to handle the potatoes with care to avoid any damage that could compromise their sprouting potential.
Cutting the Potatoes
To encourage sprouting, it is common practice to cut the potatoes into smaller pieces. Each piece should have at least one eye, or sprout bud, which will give rise to the new plant. Use a clean, sharp knife to carefully cut the potatoes into sections, ensuring that each section has a viable sprout bud. Take care not to damage the sprout buds during the cutting process, as this can hinder sprouting.
Drying the Cut Potatoes
After cutting the potatoes into sections, it is important to allow the cut surfaces to dry before proceeding with the sprouting process. Drying the potatoes helps to prevent rot and infection during the sprouting stage. Place the cut pieces in a well-ventilated area with low humidity and allow them to air dry for a few days. This drying period also helps to toughen the potato skin, making it more resistant to disease and damage.
Creating an Environment for Sprouting
Choosing a Sprouting Container
To sprout potatoes successfully, you will need to select an appropriate container. Choose a container that provides good drainage and enough space for the potato sprouts to grow. Options include plastic trays, planting pots, or even shallow wooden boxes. Ensure that the chosen container has drainage holes or a layer of pebbles at the bottom to prevent waterlogging and promote airflow.
Filling the Container
Once you have chosen a suitable sprouting container, it is time to fill it with the right growing medium. Potting soil or a mixture of compost and sand is recommended. Fill the container about three-quarters full, leaving enough space for the sprouts to emerge and grow above the soil. Ensure that the soil is loose and well-draining, as excessively moist conditions can lead to rot and fungal diseases.
Providing Proper Light and Temperature
Potato sprouts require adequate light and temperature conditions to grow vigorously. Place the sprouting container in a location that receives at least six hours of direct sunlight each day or provide artificial grow lights if natural light is limited. Maintain a temperature range of 60-70°F (15-21°C) for optimal sprouting. Avoid extreme temperatures, as they can negatively impact sprout growth and development.
Sprouting Potatoes in Soil
Preparing the Soil
Before planting the sprouted potatoes, it is essential to prepare the soil properly. Clear any weeds or debris from the planting area to create a clean and favorable environment for the sprouts. Loosen the soil with a garden fork or tiller, ensuring that it is well-drained and free from compacted areas. Incorporate organic matter, such as compost or well-rotted manure, to enhance soil fertility and provide essential nutrients for the growing potatoes.
Planting the Potatoes
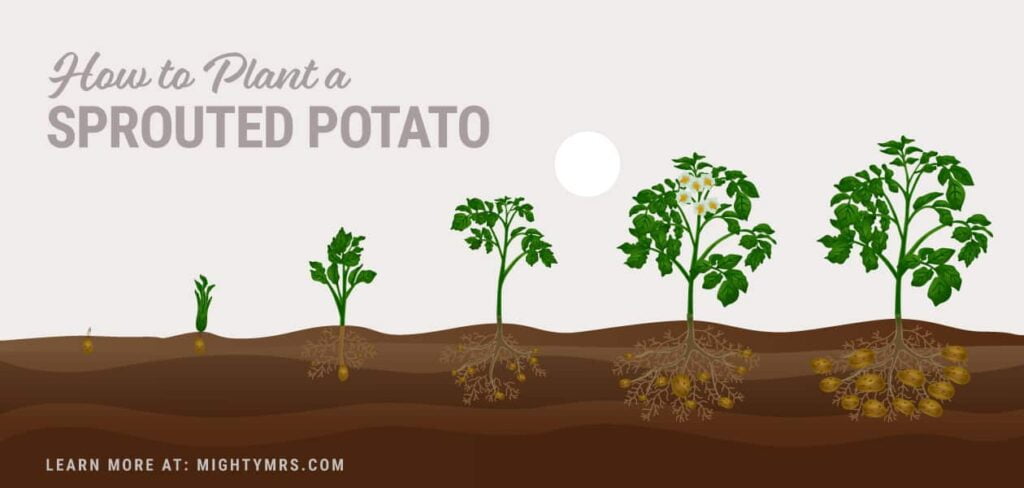
Once the soil is ready, it is time to plant the sprouted potatoes. Dig shallow trenches or holes in the prepared soil, spaced approximately 12-15 inches apart. Place the sprouted potato sections with the sprout buds facing upwards into the trenches, ensuring that they are properly covered with soil. Aim for a planting depth of around 4-6 inches, taking care not to damage the sprouts as you cover them.
Caring for Sprouted Potatoes
To ensure successful sprouting and growth, proper care is essential. Water the planted potatoes thoroughly after planting, ensuring that the soil remains consistently moist but not waterlogged throughout the sprouting period. Fertilize with a balanced organic fertilizer to provide necessary nutrients. Monitor for pests and diseases regularly and take appropriate measures to control them, as they can hinder sprout development and overall plant health.
Sprouting Potatoes in Water
Preparing the Water
If you prefer to sprout potatoes in water, start by preparing a suitable soaking solution. Fill a clean container with water, preferably at room temperature, and allow it to sit for 24 hours to allow any chlorine or harmful chemicals to dissipate. Alternatively, you can use non-chlorinated water sources, such as rainwater or well water, for optimal results.
Placing the Potatoes in Water
Once the water is prepared, gently place the sprouted potato sections into the container, ensuring that the cut sides are submerged in the water. Use toothpicks or skewers to support the potatoes, preventing them from sinking completely. Avoid overcrowding the container to allow proper airflow and prevent mold or rot. Place the container in a location with indirect light or provide artificial lighting to promote sprout growth.
Changing the Water Regularly
To maintain a healthy environment for sprouting, it is important to change the water regularly. Every two to three days, carefully remove the potatoes from the water, rinse off any accumulated slime or debris, and refill the container with fresh, non-chlorinated water. This ensures that the potatoes have access to clean water and minimizes the risk of bacterial or fungal infections.
Sprouting Potatoes in Paper Towels
Moistening the Paper Towels
Sprouting potatoes in paper towels is a convenient and efficient method. Start by moistening several sheets of paper towel with water. Make sure the towels are damp but not dripping wet. This provides the necessary moisture for the sprouting process while preventing excessive saturation.
Placing the Potatoes on Paper Towels
Once the paper towels are moistened, lay them flat on a clean surface. Gently place the sprouted potato sections on top of the paper towels, ensuring that the sprout buds are facing up. Leave adequate space between each potato to prevent overcrowding and promote airflow. Fold or cover the paper towels lightly over the potatoes, creating a protective layer that helps retain moisture.
Maintaining Moisture in the Towels
To maintain the moisture necessary for successful sprouting, it is crucial to monitor the paper towels regularly. Check the towels daily and mist them with water if they start to dry out. Ensure that the towels remain moist but not overly wet. Proper moisture levels are essential for encouraging sprout growth and preventing the paper towels from becoming a breeding ground for mold or rot.
Monitoring and Maintaining the Sprouts
Keeping Track of Growth
Throughout the sprouting process, it is important to keep track of the growth and development of the potato sprouts. Monitor the sprouts daily, noting their height, color, and overall health. This allows you to identify any issues promptly and take appropriate measures to address them. Healthy sprouts should be sturdy, green, and free from signs of wilting or disease.
Providing Adequate Water and Nutrition
To ensure the continued health and vitality of the sprouts, it is crucial to provide adequate water and nutrition. Water the sprouts regularly, maintaining a consistent level of moisture in the growing medium. Avoid overwatering, which can lead to root rot, and underwatering, which can cause stunted growth. Additionally, apply a balanced organic fertilizer according to the manufacturer’s instructions to provide essential nutrients for optimal sprout development.
Avoiding Overcrowding
As the potato sprouts grow, it is important to prevent overcrowding in the sprouting containers or growing area. Overcrowding can lead to competition for resources and increase the risk of disease transmission. Thin out the sprouts, leaving only the healthiest and strongest ones in the container. This allows the remaining sprouts to have sufficient space and resources for optimal growth and development.
Transferring the Sprouts for Planting
Developing Strong Roots
Before transplanting the sprouts into the garden, it is crucial to develop strong and healthy root systems. Gradually introduce the sprouts to outdoor conditions by placing them in a sheltered location with partial sunlight and protection from strong winds. This process, known as hardening off, helps the sprouts adapt to the outdoor environment and strengthens their roots, increasing their chances of survival when transplanted.
Hardening Off the Sprouts
To harden off the sprouts effectively, gradually increase their exposure to outdoor conditions over a period of 7-10 days. Begin by placing the sprouts outdoors for a few hours each day, gradually increasing the time and exposure to direct sunlight. This gradual transition prepares the sprouts for the outdoor environment, reducing the risk of transplant shock and ensuring a successful transition.
Transplanting in the Garden
Once the sprouts have been appropriately hardened off, they are ready to be transplanted into the garden. Choose a well-prepared planting area with loose, fertile soil. Dig holes or trenches that are deep enough to accommodate the sprouts, ensuring that the sprout buds are above ground level. Gently place each sprout in its designated hole, taking care not to damage the delicate roots. Firm the soil gently around the sprouts, ensuring they are adequately supported.
Troubleshooting Potatoes Sprouting
Dealing with Mold or Rot
Mold or rot can sometimes occur during the sprouting process, particularly when there is excessive moisture. If you notice mold or rot on the sprouted potatoes or in the sprouting container, take immediate action to prevent further damage. Remove any affected potatoes or sprouts, and adjust the moisture levels or ventilation in the sprouting environment. Ensure that the sprouts are not overcrowded and that the growing medium is well-drained to minimize the risk of mold or rot.
Preventing Pests and Diseases
Pests and diseases can pose a threat to the sprouting potatoes and hinder their growth. To prevent infestations and infections, monitor the sprouts regularly for any signs of pests or diseases. Apply organic pest control methods or treatments when necessary, ensuring that they are safe for both the sprouts and the environment. Additionally, practice proper sanitation and hygiene to minimize the risk of disease transmission.
Fixing Leggy Sprouts
Leggy sprouts, characterized by elongated and weak stems, can occur when the sprouts do not receive adequate light or are overcrowded. To fix leggy sprouts, provide them with more direct sunlight or adjust the lighting conditions if sprouting indoors. Additionally, thin out overcrowded sprouts, allowing the remaining sprouts to receive sufficient light and air circulation. Supporting leggy sprouts with stakes can also help them grow more upright and develop stronger stems.
Harvesting and Using Sprouted Potatoes
Harvesting the Sprouted Potatoes
The sprouted potatoes are ready to be harvested when the foliage starts to yellow and die back. This typically occurs 90-120 days after planting, depending on the potato variety and growing conditions. Carefully dig around the base of the plants and gently lift the tubers from the soil, being cautious not to damage them. Brush off any excess soil and allow the harvested potatoes to dry for a few hours before storing or using them.
Storing Sprouted Potatoes
After harvesting, it is important to store the sprouted potatoes properly to maintain their quality and prevent sprouts from growing excessively. Choose a cool, dark, and well-ventilated storage area, such as a root cellar or cool basement. Place the potatoes in a breathable container, such as a mesh bag or a wooden crate, to allow for proper airflow. Check the stored potatoes regularly and remove any sprouting or spoiled potatoes to prevent the spread of disease.
Cooking with Sprouted Potatoes
Sprouted potatoes can still be used in cooking, although they may have slight changes in texture and flavor compared to non-sprouted potatoes. Cut off any excessively long sprouts or remove any green skin that may have developed. Sprouted potatoes are suitable for various culinary applications, including boiling, baking, mashing, or roasting. Experiment with different recipes to make the most of your sprouted potatoes and enjoy their unique qualities in your favorite dishes.
