I used to wonder if starting seeds for my home garden would be a difficult task, but now I can confidently say it’s easier than I ever imagined. With just a few simple steps and a bit of patience, anyone can successfully start seeds and watch them grow into vibrant, flourishing plants. In this article, I’ll share my personal experience and provide some helpful tips to ensure your seed starting journey is a breeze. So, if you’ve ever questioned whether it’s hard to start seeds, get ready to be pleasantly surprised.
Starting seeds may seem like a daunting task, especially for beginners, but with the right knowledge and preparations, it can be an enjoyable and rewarding experience. In this comprehensive article, I will guide you through each step of the seed starting process, from seed selection to maintenance and care. So, let’s get started!
Seed Selection
Choosing the right seeds
Selecting the right seeds is crucial for a successful seed starting journey. When choosing seeds, consider the specific requirements of the plant, such as sunlight, water, and temperature. Additionally, take into account your local climate and the growing season. It’s also essential to choose seeds from reputable sources to ensure quality and viability.
Considerations for beginners
For beginners, it’s advisable to start with easy-to-grow seeds that are less demanding and have a higher success rate. Herbs like basil and parsley, or vegetables like lettuce and radishes, are great options for beginners. These seeds germinate relatively quickly and require minimal care.
Evaluating seed quality
To ensure good germination rates, it’s important to evaluate the quality of the seeds. Check the expiration date on the seed packet, as older seeds might have lower germination rates. Look for seeds that are plump, uniform in size, and free from any signs of damage or disease. Additionally, consider investing in organic or heirloom seeds, as they often have higher quality and genetic diversity.
| Plant | Optimal Germination Temperature (°F) | Average Germination Time (Days) | Care Tips |
|---|---|---|---|
| Tomatoes | 70-80 | 5-10 | Keep soil consistently moist; provide strong, direct light once sprouted. |
| Basil | 70-75 | 5-10 | Avoid overwatering; ensure good airflow around seedlings. |
| Lettuce | 60-70 | 2-8 | Do not cover seeds with soil; they require light for germination. Keep soil slightly moist. |
| Radishes | 55-75 | 3-6 | Plant in full sun or partial shade; water moderately. |
| Bell Peppers | 70-80 | 7-14 | Keep in warm conditions; avoid overwatering. |
| Marigolds | 70-75 | 4-7 | Plant in a warm, sunny location; avoid excess watering. |
| Cucumbers | 70-85 | 3-10 | Use larger starting pots to avoid disturbing roots; keep in warm conditions; water consistently. |
| Zucchini | 70-85 | 5-10 | Plant in full sun; maintain evenly moist soil conditions. |
Indoor vs Outdoor
Advantages of starting seeds indoors
Starting seeds indoors gives you more control over the growing environment. It allows you to start planting earlier, extending the growing season. Indoor seed starting also provides protection from pests, diseases, and adverse weather conditions. It is particularly beneficial for plants that require a longer growing season or those with specific temperature requirements.
Benefits of direct sowing outdoors
Direct sowing seeds in the outdoor garden has its advantages too. It eliminates the need for transplanting, reducing the chances of transplant shock. Some plants, like root crops and sunflowers, are better suited for direct sowing as they do not transplant well. Direct sowing also saves time and effort compared to indoor seed starting.
Factors to consider for indoor seed starting
When starting seeds indoors, consider the space available for seed trays and lighting requirements. Ensure you have a suitable location with adequate light and temperature control. Consider investing in grow lights or fluorescent fixtures to provide the necessary light for healthy seedlings. Additionally, make sure to have a well-draining seed starting mix and proper containers for seed germination.
Factors to consider for outdoor seed starting
For successful outdoor seed starting, it’s essential to prepare the soil properly. Clear any weeds or debris and amend the soil with organic matter to improve its fertility and drainage. Consider the timing of seed sowing based on your local climate and the specific requirements of the plant. Protect the seeds from pests, birds, and extreme weather conditions by covering them with netting or row covers if needed.
Soil Preparation
Testing and amending the soil
Before starting seeds, it’s crucial to test your soil’s pH, nutrient levels, and composition. Soil testing kits are readily available and provide valuable information to help you make the necessary amendments. Adjust the pH level if needed and add organic matter, such as compost or well-rotted manure, to improve the soil structure and fertility.
Creating a suitable seedbed
Creating a suitable seedbed is vital for healthy seed germination. Loosen the soil to a depth of at least six inches and remove any rocks or debris. Rake the soil surface to create a fine, crumbly texture. This will provide an ideal environment for seeds to establish their roots and emerge from the soil.
Seed starting mixes
When starting seeds indoors or in containers, it’s important to use a suitable seed starting mix. These mixes are light, sterile, and well-draining, providing the optimal conditions for seed germination. Avoid using regular garden soil, as it may contain pathogens or be too heavy for young seedlings. Seed starting mixes can be purchased from gardening centers or made at home using a combination of peat moss, vermiculite, and perlite.
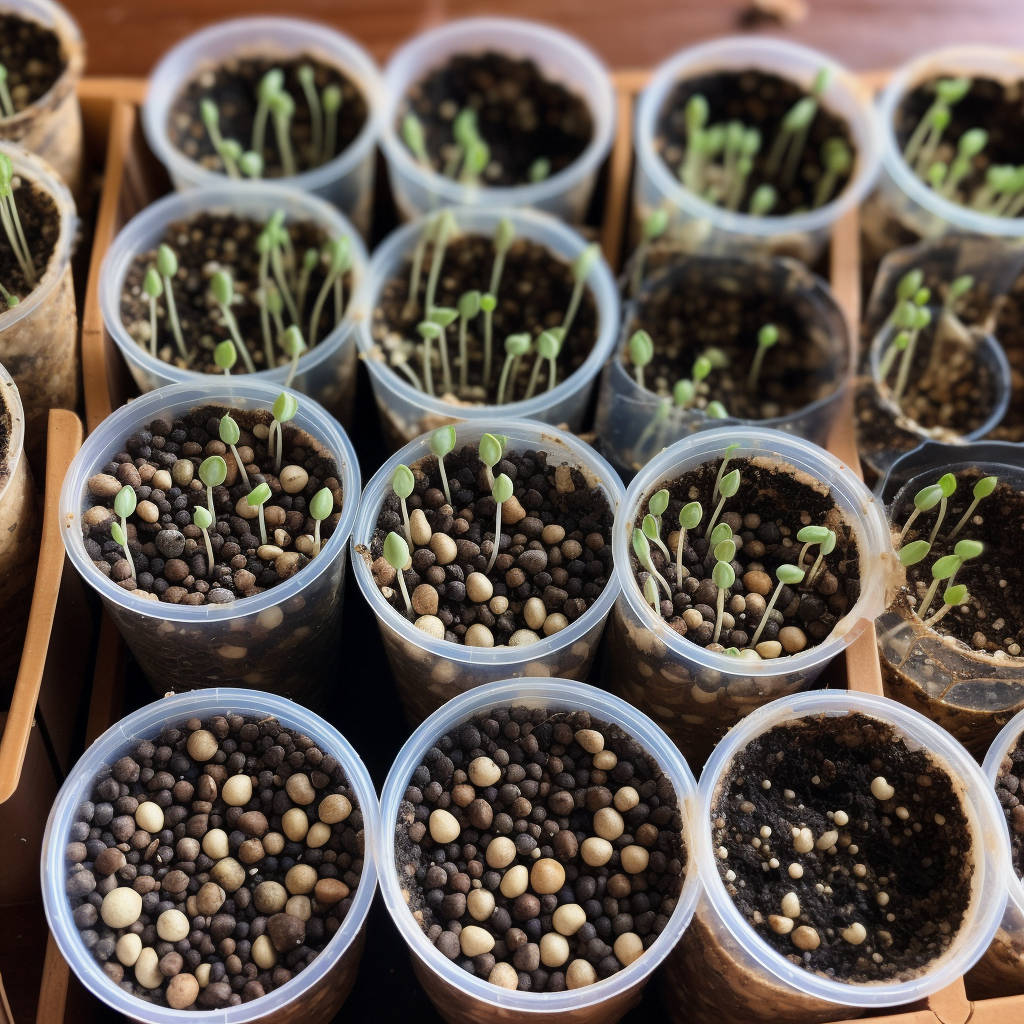
Germination Process
Understanding seed germination
Seed germination is the process by which a seed transforms into a young plant. It requires the right combination of moisture, temperature, and oxygen. Each seed has specific germination requirements, and understanding these requirements is crucial for successful seed starting. Refer to the seed packet or reliable gardening resources for information on the optimal conditions for germination.
Techniques to improve germination
To improve germination rates, you can employ a few techniques. Pre-soaking certain seeds in warm water for a few hours or overnight can help soften the seed coat and speed up germination. Scarification is another technique that involves nicking or scratching the seed coat to allow water penetration. Stratification, which mimics the natural winter conditions, can also be used for seeds that require cold temperatures to germinate.
Common challenges and troubleshooting
Seed germination can face challenges such as fungal diseases, poor seed quality, or incorrect environmental conditions. To address these issues, ensure proper air circulation and avoid overwatering, as excess moisture can lead to fungal diseases. Providing consistent moisture and temperature will also help improve germination rates. If you encounter slow or unsuccessful germination, evaluate the potential causes and make the necessary adjustments.
Light and Water Requirements
Providing adequate light
Light is crucial for seedlings’ growth and development. If starting seeds indoors, place them in a location with direct sunlight or use grow lights as a supplement. Position the lights a few inches above the seedlings and adjust their height as the seedlings grow. Aim for 12-16 hours of light daily to encourage strong, compact growth. Outdoor seedlings should be placed in a sunny area to receive at least six hours of direct sunlight.
Proper watering techniques
Proper watering is essential to ensure the health of seedlings. Water the seedlings gently and avoid overwatering, which can lead to root rot or damping-off disease. Use a watering can with a fine spray nozzle or mist the soil surface to prevent disturbing the delicate seedlings. Water consistently, keeping the soil evenly moist, but not overly saturated. Use your finger to check the moisture level in the soil before watering.
Maintaining optimal humidity
Maintaining proper humidity levels is vital, especially during the early stages of seed germination. To increase humidity, cover seed trays or containers with a plastic dome or plastic wrap. This helps retain moisture and creates a mini greenhouse effect. Once seedlings emerge, gradually remove the cover to acclimate them to lower humidity levels. Monitor the humidity using a hygrometer and adjust ventilation or misting as needed.
Temperature and Environment
Importance of temperature in seed starting
Temperature plays a significant role in seed germination and seedling growth. Each plant species has a specific temperature range for optimal germination. Generally, most seeds germinate well at temperatures between 65°F and 85°F (18°C and 29°C). Use a seedling heat mat or place the seed trays near a heat source to provide consistent warmth for germination. Once the seedlings emerge, lower the temperature slightly to promote sturdy growth.
Creating optimal conditions
Creating optimal conditions for seed germination involves maintaining a stable temperature and providing good air circulation. Use a thermometer to monitor the temperature and adjust heating or cooling devices accordingly. Air circulation is important to prevent fungal diseases and strengthen the seedlings. Use a small fan on the lowest setting or gently brush seedlings with your hand to create airflow.
Protecting seeds from extreme conditions
Protecting seeds from extreme environmental conditions is crucial for their survival. Cold temperatures can delay or inhibit germination, while excessive heat can cause seed dormancy or damage. Shield the seeds from harsh weather, such as frost or heatwaves, with protective coverings like cloches or shade cloth. Consider planting seeds within the recommended planting dates for your area, taking into account the average last frost date.
Transplanting
Knowing when to transplant
Transplanting is the process of moving seedlings from their starting containers to larger pots or the outdoor garden. Knowing when to transplant is essential to ensure the seedlings have developed adequate root systems. Look for the presence of true leaves, which are the mature leaves that appear after the seedling’s cotyledons. Once the seedlings have true leaves and are sturdy enough to handle, they can be transplanted.
Proper technique for transplanting
Proper technique is crucial for successful transplanting without causing damage to the seedlings. Carefully loosen the soil around the seedling, holding it by the leaves to avoid damaging the stem. Dig a hole in the transplanting location that is slightly larger than the root ball of the seedling. Gently place the seedling in the hole, ensuring the top of the root ball is level with the soil surface. Backfill the hole with soil and lightly press it around the seedling.
Hardening off seedlings
Hardening off is the process of gradually acclimating seedlings to outdoor conditions before transplanting. This step is essential to prevent transplant shock and ensure the seedlings’ survival. Start by exposing the seedlings to outdoor conditions for a few hours each day, gradually increasing the time over a week. Protect them from direct sun, wind, and extreme temperatures during this period. Once hardened off, the seedlings are ready for permanent transplantation.
Pests and Diseases
Common pests that affect seedlings
There are several pests that pose a threat to seedlings, including aphids, whiteflies, fungus gnats, and cutworms. These pests can damage the tender young plants, stunt growth, or even cause death. Regularly inspect your seedlings for signs of pest infestation, such as yellowing leaves, holes, or sticky residue. Identify the specific pests and employ appropriate control measures, such as introducing beneficial insects, using organic insecticidal soaps, or using physical barriers.
Preventive measures to avoid pests
Taking preventive measures can help reduce the risk of pest infestation. Avoid overwatering, as damp conditions can attract pests like fungus gnats. Keep the growing area clean and remove any plant debris that may harbor pests. Use companion planting techniques to repel pests naturally and attract beneficial insects. Consider using organic pest control methods to minimize the impact on the environment and beneficial organisms.
Common seedling diseases
Seedling diseases, such as damping-off, root rots, and fungal infections, can quickly destroy young plants. These diseases thrive in damp conditions and can be caused by overwatering, poor air circulation, or contaminated soil. To prevent seedling diseases, ensure proper ventilation, use clean containers and equipment, and provide adequate spacing between seedlings. Applying a fungicide or using soilless seed starting mixes can also help reduce the risk of disease.
Early detection and treatment
Early detection of pests and diseases is crucial for effective treatment. Regularly inspect your seedlings for any signs of damage, discoloration, or abnormal growth. Address the issues promptly to prevent further spread and damage. Prune affected leaves or remove severely infected plants. Use organic or chemical treatments based on the severity of the infestation or disease. Always follow the instructions provided by the manufacturer when applying treatments.
Maintenance and Care
Fertilizing seedlings
Proper fertilization is important to provide seedlings with essential nutrients for healthy growth. Start fertilizing seedlings when they develop their second set of true leaves. Use a balanced liquid fertilizer diluted to half strength to avoid overfertilization. Apply the fertilizer once every two weeks or follow the recommended application rate specified on the package. Gradually increase the strength of the fertilizer as the seedlings grow.
Pruning and thinning
Pruning and thinning seedlings are necessary for maintaining optimal plant health and preventing overcrowding. Pruning involves removing any damaged or diseased leaves and stems to promote new growth. Thinning refers to the removal of excess seedlings in crowded containers or garden beds to allow sufficient space for healthy growth. Thinned seedlings can be transplanted elsewhere or used as fresh greens in salads or smoothies.
Providing support and trellising
Some plants, like tomatoes, peppers, and vining vegetables, require support or trellising to ensure proper growth and prevent breakage. Install stakes or cages around these plants to provide support as they grow. Consider using trellises or fences for climbing plants like cucumbers or peas. Providing support not only keeps the plants upright but also improves air circulation and reduces the risk of diseases.
Preventing overwatering
Overwatering is a common mistake that can lead to root rot, mold, and overall poor plant health. It’s important to strike a balance between providing adequate moisture and avoiding overwatering. Allow the soil to dry slightly between waterings to prevent waterlogged conditions. Adjust the watering frequency based on the environmental conditions and the specific moisture needs of the plants. Remember to always water the soil, not the foliage, to minimize the risk of fungal diseases.
Success Tips and Tricks
Using bottom heat for faster germination
Providing bottom heat is an effective technique to speed up seed germination. Use a seedling heat mat or place the seed trays on a warm surface, such as the top of a refrigerator or water heater. The gentle warmth stimulates root growth and encourages quicker germination. Monitor the temperature to ensure it remains within the optimal range for the specific seeds being germinated.
Utilizing grow lights for better results
Inadequate natural light can hinder seedling growth. Supplementing natural light with grow lights can provide consistent light levels and promote strong, healthy seedlings. Use fluorescent tubes or LED grow lights designed for seed starting. Position the lights a few inches above the seedlings and adjust their height as the seedlings grow. Aim to provide 12-16 hours of light daily for optimal results.
Employing companion planting
Companion planting is a technique used to maximize the benefits between different plant species when grown together. Some plants naturally repel pests or attract beneficial insects when planted near each other. For example, planting marigolds near tomatoes can help deter pests like aphids. Research companion planting combinations suitable for your specific crops to enhance pest control and improve overall garden health.
Keeping a seed starting journal
Maintaining a seed starting journal is a valuable practice that helps track your gardening progress and learn from your successes and failures. Record important details such as seed varieties, planting dates, germination rates, and any observations or issues encountered. This information will help you refine your techniques in future seasons and make more informed decisions about seed selection, timing, and care.
Starting seeds may seem challenging at first, but with the right knowledge and techniques, it becomes a rewarding and enjoyable experience. By carefully selecting seeds, providing optimal growing conditions, and addressing any challenges along the way, you can successfully start your own plants from seeds. So, roll up your sleeves, get your hands dirty, and embark on the exciting journey of starting seeds in your own home garden!


