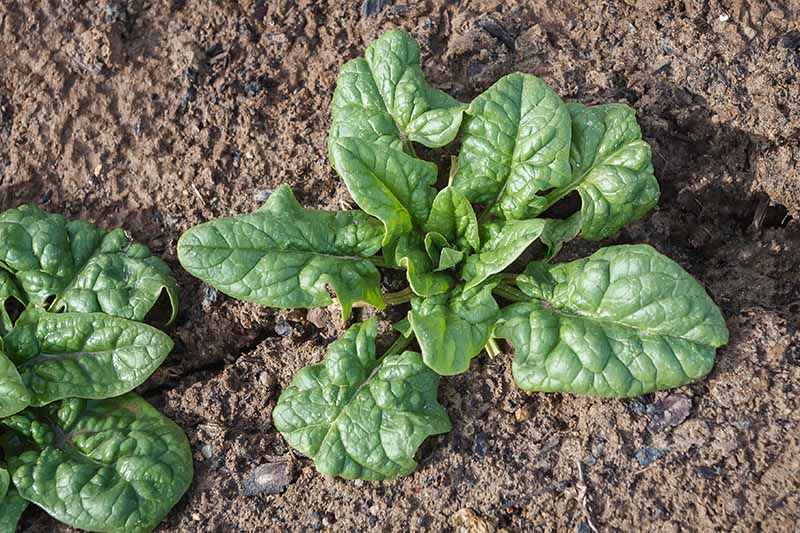
So, you’ve decided to try your hand at gardening and you’ve got your sights set on some delicious Bloomsdale spinach? Well, lucky for you, we’ve got some handy growing tips to help you achieve success in cultivating this nutritious leafy green. Whether you’re a seasoned gardener or just starting out, these tips will provide you with all the information you need to grow your own bountiful crop of Bloomsdale spinach. So, grab your gardening gloves and let’s dive into the world of growing this delectable vegetable!
Choosing the Right Location
Sunlight Requirements
When choosing a location to grow Bloomsdale Spinach, it’s important to consider its sunlight requirements. This leafy green thrives in partial shade to full sun, so find an area in your garden that receives at least six hours of sunlight each day. If you have limited sun exposure, choose a spot that gets morning sun and shade during the hot afternoon hours. Providing the right amount of sunlight will ensure healthy growth and a bountiful harvest of Bloomsdale Spinach.
Soil Requirements
The soil plays a vital role in the success of growing Bloomsdale Spinach. It prefers well-drained soil that is rich in organic matter. Before planting, make sure to remove any large rocks, weeds, or debris from the area. This will allow the spinach roots to grow freely and prevent any obstructions. Amending the soil with compost or aged manure will improve its fertility and structure. Aim for a pH level between 6.5 and 7.5, which is slightly acidic to neutral. By ensuring the soil meets these requirements, you’ll create an ideal environment for your Bloomsdale Spinach to thrive.
Temperature and Climate
Bloomsdale Spinach is a cool-season crop that prefers mild temperatures. It can tolerate light frosts but is not suited for hot summer conditions. To achieve the best results, plant your spinach in spring or fall when the temperatures are between 50°F and 70°F (10°C – 21°C). In regions with a temperate climate, Bloomsdale Spinach can be grown as a winter crop. Understanding the temperature and climate needs will help you determine the ideal time to plant and ensure the success of your Bloomsdale Spinach.
Preparing the Soil
Clearing the Area
Before planting Bloomsdale Spinach, it’s important to clear the area of any existing vegetation. Remove weeds, grass, and any other unwanted plants that may compete with the spinach for nutrients, water, and space. Clearing the area will provide a clean slate for your spinach to grow and reduce the risk of pests and diseases.
Adding Organic Matter
To enhance the fertility and structure of the soil, add organic matter such as compost or aged manure. This will provide essential nutrients and improve water retention, promoting healthy root development and overall plant growth. Spread a layer of organic matter over the planting area and use a garden fork or tiller to work it into the soil to a depth of around 6 inches. Organic matter not only nourishes the Bloomsdale Spinach but also improves the overall health of your garden soil.
Applying Fertilizer
To further boost the nutrient content of the soil, consider applying a balanced fertilizer before planting your Bloomsdale Spinach. Choose a fertilizer specifically formulated for leafy green vegetables, following the instructions on the package for application rates. Lightly work the fertilizer into the top few inches of soil, being careful not to damage the spinach roots. Fertilizing will provide a nutrient-rich environment for your Bloomsdale Spinach to grow and thrive.
Improving Drainage
Good drainage is essential for growing healthy Bloomsdale Spinach. If your soil tends to be heavy and waterlogged, it’s crucial to improve drainage before planting. One method is to create raised beds or mounds, which elevate the spinach plants above the surrounding ground and allow excess water to drain away more easily. Alternatively, you can add coarse sand or perlite to the soil, which will help to break up compacted areas and improve drainage. By optimizing drainage, you’ll prevent waterlogged soil, which can lead to root rot and other issues.

Planting Bloomsdale Spinach
Starting from Seeds
One popular method of planting Bloomsdale Spinach is by starting from seeds. This gives you the advantage of choosing from a wide variety of seed options and allows for greater control over the growing process. Begin by preparing the soil as described in the previous section. Sow the seeds about half an inch deep and one inch apart in rows that are 12-18 inches apart. Gently cover the seeds with soil and water thoroughly but gently. As the seedlings emerge, thin them out, leaving around 6-8 inches of spacing between each plant. Starting from seeds allows you to enjoy the complete growing cycle of Bloomsdale Spinach, from germination to a fully mature plant.
Transplanting Seedlings
If you prefer a quicker start and don’t want to wait for seeds to germinate, you can also transplant Bloomsdale Spinach seedlings into your garden. Seedlings are available at many garden centers or can be grown indoors under controlled conditions. Before transplanting, make sure the soil is adequately prepared and the seedlings are properly hardened off, gradually acclimating them to outdoor conditions. Dig holes just deep and wide enough to accommodate the root ball of each seedling, spacing them about 6-8 inches apart. Place the seedlings in the holes, backfill with soil, and gently firm the soil around the base of each plant. Water the transplants thoroughly to help them establish in their new environment.
Watering and Mulching
Watering Requirements
Bloomsdale Spinach requires consistent moisture throughout its growing period. While it prefers moist soil, it’s crucial to avoid overwatering, which can lead to rot and fungal diseases. Aim to keep the soil evenly moist, but not soggy. Regularly check the moisture level by inserting your finger into the soil. If it feels dry up to your first knuckle, it’s time to water. It’s best to water in the morning to allow the foliage to dry out during the day, reducing the risk of diseases. Use a watering can or a gentle spray nozzle on your hose to water at the base of the plants, ensuring the water reaches the roots where it’s needed the most.
Mulching Benefits
Mulching offers numerous benefits for your Bloomsdale Spinach plants. A layer of organic mulch, such as straw, wood chips, or dried leaves, helps retain soil moisture, suppresses weed growth, and moderates soil temperature. Mulching also acts as a protective barrier, preventing soil erosion caused by heavy rain. By keeping the soil consistently moist and reducing competition from weeds, your Bloomsdale Spinach plants will be able to thrive and produce an abundant crop.
Proper Mulching Techniques
To effectively mulch your Bloomsdale Spinach plants, follow these proper techniques. Once your seedlings have emerged or transplants are established, spread a layer of organic mulch around the base of the plants. Be sure to leave a small gap between the mulch and the plant stems to prevent any potential rotting. Aim for a mulch depth of around 2-3 inches. Check the mulch regularly and replenish it as needed throughout the growing season, taking care not to pile too much mulch against the plant stems. Proper mulching will help your Bloomsdale Spinach plants thrive and contribute to a successful harvest.

Fertilizing Bloomsdale Spinach
Understanding Nutrient Needs
To ensure the healthy growth and development of your Bloomsdale Spinach, it’s crucial to understand its nutrient needs. Spinach is a heavy feeder, meaning it requires a steady supply of nutrients throughout its growth cycle. Key nutrients for spinach include nitrogen, phosphorus, and potassium, along with micronutrients such as iron and magnesium. Providing the right balance of these nutrients will enhance the flavor, texture, and overall health of your spinach plants.
Choosing the Right Fertilizer
When selecting a fertilizer for your Bloomsdale Spinach, choose one that is specifically formulated for leafy greens or vegetables. A balanced fertilizer with equal or close to equal amounts of nitrogen, phosphorus, and potassium, such as a 10-10-10 or 14-14-14 blend, is ideal for promoting healthy growth and high-quality spinach leaves. Additionally, consider using organic fertilizers, such as compost or well-rotted manure, which provide a slow-release source of nutrients and improve soil fertility over time.
Applying Fertilizer
To provide your Bloomsdale Spinach with the necessary nutrients, apply fertilizer following the recommended rates on the package. Spread the fertilizer evenly around the drip line of the plants, which is the area directly beneath the outermost branches. Take care to avoid direct contact between the fertilizer and the plant stems. Water the area thoroughly after applying the fertilizer to ensure the nutrients are absorbed by the soil and made available to the spinach plants. Regularly monitor the plant’s nutrient needs, and if necessary, apply additional fertilizer as the growing season progresses.
Controlling Pests and Diseases
Common Pests
While Bloomsdale Spinach is relatively resistant to pests, a few common invaders may pose a threat to your plants. Aphids, cabbage loopers, and flea beetles are among the most common pests that target spinach. These pests can cause damage by feeding on the foliage, leading to stunted growth and reduced yields.
Preventive Measures
Prevention is the key to keeping pests at bay. By implementing a few preventive measures, you can minimize the risk of pest infestations. Start by regularly inspecting your plants for any signs of pests or damage. Keep your garden clean and free of weeds, as they can attract pests and provide hiding places. Consider planting companion plants, such as marigolds or chives, which can act as natural repellents for pest insects. Additionally, practicing crop rotation each year can help disrupt pest life cycles and reduce their population.
Natural Remedies
If pest problems do arise, there are several natural remedies that can effectively control them. Neem oil, an organic insecticide derived from the neem tree, is an excellent option for combating aphids and other chewing or sucking insects. Homemade sprays made from ingredients like garlic, onion, or hot pepper can also deter pests and be used as a repellent. Introducing beneficial insects like ladybugs or lacewings can also help control pest populations naturally. By using natural remedies, you can protect your Bloomsdale Spinach from pests while maintaining a chemical-free environment.

Harvesting Bloomsdale Spinach
Determining Readiness
Knowing when to harvest your Bloomsdale Spinach is crucial to ensure the leaves are at their peak flavor and tenderness. The spinach plants typically reach maturity within 40-50 days after planting. Harvesting can begin when the leaves are large enough to be used, typically around 4-6 inches in length. The outer leaves can be harvested individually, allowing the inner leaves to continue growing. If you prefer to harvest the entire plant, cut it at ground level, leaving about an inch of stem to encourage regrowth. Regularly check your plants for readiness and harvest as needed to enjoy fresh, nutritious spinach throughout the growing season.
Harvesting Techniques
There are two common techniques for harvesting Bloomsdale Spinach: the cut-and-come-again method and the full plant harvest. The cut-and-come-again method involves harvesting only the outer leaves, allowing the inner leaves to continue growing. With a sharp pair of scissors or garden shears, cut the outer leaves from the base of the plant, leaving the center intact. This method allows for multiple harvests from the same plant and ensures a continuous supply of fresh spinach. Alternatively, if you prefer to harvest the entire plant, grasp the base of the plant and cut it at ground level. Whichever method you choose, make sure to handle the spinach leaves gently to avoid bruising and damage.
Storing and Using Bloomsdale Spinach
Proper Storage
After harvesting your Bloomsdale Spinach, it’s important to store it properly to preserve its freshness and nutritional value. Start by gently rinsing the leaves under cool running water to remove any dirt or debris. Shake off any excess water and pat the leaves dry with a clean kitchen towel or paper towels. Alternatively, you can use a salad spinner to remove excess moisture. Store the spinach in a perforated plastic bag or airtight container, placing a paper towel inside to absorb any excess moisture. Keep it in the refrigerator’s vegetable crisper drawer, where it can stay fresh for up to a week.
Recipe Ideas
Bloomsdale Spinach is a versatile leafy green that can be used in a variety of delicious recipes. Consider adding it to salads, sautéing it with garlic and olive oil, or incorporating it into smoothies and juices for a nutrient-packed boost. You can also use Bloomsdale Spinach in homemade pesto, frittatas, or soups. Its tender leaves and mild flavor make it a versatile ingredient that can enhance any dish. Explore different recipes and cooking methods to fully enjoy the fresh flavor of your homegrown Bloomsdale Spinach.

Extending the Growing Season
Succession Planting
To extend the growing season and ensure a continuous supply of Bloomsdale Spinach, consider implementing succession planting. Succession planting involves sowing small batches of seeds at regular intervals, usually every two to three weeks. By staggering the planting, you can ensure a continuous harvest throughout the growing season. As one batch of spinach approaches maturity, the next batch will be just starting to emerge. This method maximizes your yield and allows you to enjoy fresh Bloomsdale Spinach for a longer period.
Protective Covers
In regions with colder climates, protective covers can be used to extend the growing season of Bloomsdale Spinach. Cold frames, row covers, or even simple plastic sheeting can help provide a few extra weeks of growing time by protecting the spinach from freezing temperatures and frost. Covering the plants at night and removing the covers during the day when the temperatures are milder will help create a favorable microclimate for your Bloomsdale Spinach. By using protective covers, you can lengthen the harvest window and enjoy fresh spinach even during cooler periods.
Troubleshooting Common Issues
Yellowing Leaves
Yellowing leaves in Bloomsdale Spinach can be a sign of nutrient deficiency or overwatering. Check the soil moisture levels, ensuring it’s not too wet or dry. Adjust your watering accordingly. If the soil is consistently moist and yellowing persists, it may indicate a nutrient deficiency. Apply a balanced fertilizer, rich in nitrogen, to replenish the necessary nutrients. Additionally, ensure proper spacing and ventilation to prevent overcrowding, which can lead to poor air circulation and increased moisture, promoting disease development.
Bolting
Bolting, which is the premature flowering and subsequent seed formation, can occur in Bloomsdale Spinach when exposed to high temperatures or prolonged periods of stress. Once bolting occurs, the leaves become bitter, and the edible portion deteriorates. To prevent bolting, ensure your spinach plants are grown in a cool and shaded spot or provide shade cloth during hot periods. Harvest the spinach leaves promptly when they reach the desired size, as allowing the plant to establish too long can trigger bolting.
Leaf Spot
Leaf spot is a fungal disease that can affect the leaves of Bloomsdale Spinach. It appears as small, dark spots on the foliage, which may expand and merge, causing the leaves to wilt and die. To prevent leaf spot, water your spinach plants at the base and avoid overhead irrigation, as wet leaves create an ideal environment for fungal growth. Maintain proper air circulation by providing adequate spacing between plants. In case of an outbreak, remove and destroy infected leaves and consider using organic fungicides formulated for leaf spot control.
By following these comprehensive growing tips for Bloomsdale Spinach, you’ll be well on your way to a successful harvest. Enjoy the process of nurturing your plants, and savor the satisfaction of eating fresh, homegrown spinach packed with nutrients and flavor. Happy gardening!


