Imagine yourself with a bountiful garden filled with delicious and nutritious vegetables. If you’re looking to add a touch of autumnal delight to your harvest, then planting acorn squash is the way to go. Growing acorn squash may seem intimidating at first, but fret not! With a little guidance, you’ll be enjoying homemade squash recipes in no time. In this article, we will explore the simple yet rewarding process of planting acorn squash, from choosing the perfect location to nurturing your plants until they are ripe and ready for harvest. So roll up your sleeves, grab your gardening gloves, and let’s dive into the world of acorn squash cultivation.

Choosing the Right Location
When choosing a location for planting acorn squash, it’s important to consider their sunlight requirements. Acorn squash plants thrive in full sun, so select a spot in your garden that receives at least 6 to 8 hours of direct sunlight daily. This will ensure optimal growth and fruit production.
In addition to sunlight, you need to prepare the soil. Acorn squash plants prefer well-draining soil with a pH level between 6.0 and 7.0. Before planting, amend the soil with organic matter such as compost to improve its fertility and drainage. This will provide the plants with the necessary nutrients for healthy growth.
Another crucial aspect of preparing the soil is ensuring adequate drainage. Acorn squash plants are susceptible to rot if the soil becomes waterlogged. To prevent this, you can add organic matter or sand to improve the drainage in heavy soils. Proper drainage will promote root health and reduce the risk of plant diseases.
Selecting the Acorn Squash Seeds
When selecting acorn squash seeds, you have a choice between hybrid or heirloom varieties. Hybrid seeds are a cross between two different parent plants and are bred for specific traits, such as disease resistance or higher yields. On the other hand, heirloom seeds are open-pollinated and have been passed down for generations, preserving their unique characteristics.
To ensure successful germination, it’s essential to check the seed viability. You can perform a simple test by placing a few seeds in a damp paper towel and keeping them warm. If the seeds sprout within a week or so, they are likely viable and can be planted.
Considering the seed source is also important. Purchase seeds from a reputable nursery or garden center to ensure they are of good quality and free from disease. Alternatively, you can save seeds from a mature, healthy acorn squash plant in your garden. Just make sure to properly dry and store them for future use.
Starting Seeds Indoors
Starting acorn squash seeds indoors gives them a head start and allows you to control the growing conditions. Determine the ideal time for indoor sowing based on your region’s frost dates. Acorn squash plants are sensitive to frost, so you’ll want to start them indoors 3 to 4 weeks before the last expected frost.
Before sowing the seeds, gather the necessary supplies. You’ll need seed trays or small pots, seed starting mix, a heat mat or warm location, and a light source such as fluorescent lights or a sunny windowsill. The seed starting mix should be loose and well-draining to prevent waterlogged seeds.
Sow the seeds about one inch deep in the seed trays or pots, placing one seed per cell or pot. Keep the soil consistently moist but not waterlogged, and ensure they receive sufficient light and warmth. Once the seedlings have developed a few true leaves, they can be transplanted into larger containers or directly into the garden.
Direct Sowing in the Garden
If you prefer to skip the indoor seed starting process, you can directly sow acorn squash seeds in the garden. However, it’s crucial to choose the right time for direct sowing. Wait until after the last expected frost in your area and ensure the soil has warmed up to a temperature of at least 60°F (15°C). Cold soil can lead to poor germination and hinder plant growth.
Before planting the seeds, prepare the planting area by loosening the soil and removing any weeds or debris. Acorn squash plants prefer a slightly mounded planting area, which helps with drainage. Create small hills or raised rows to provide good root aeration and prevent water accumulation.
Plant the seeds one inch deep, leaving a space of about 3 to 4 feet between each seed. Remember to mark the planting spots to differentiate them from weeds or other plants. Water the newly planted seeds gently but thoroughly, ensuring the soil stays evenly moist until germination occurs.

Watering and Fertilizing
Establishing a watering routine is essential for the healthy growth of acorn squash plants. Water them deeply once a week, providing enough moisture to penetrate the root zone. It’s best to water in the morning to allow the foliage to dry before evening, reducing the risk of fungal diseases.
To provide essential nutrients to your acorn squash plants, consider using organic fertilizers. Organic options such as compost, well-rotted manure, or fish emulsion are rich in nutrients and help improve soil fertility. Apply the fertilizer according to the package instructions or based on a soil test for precise recommendations.
While proper watering and fertilizing are crucial, it’s important to avoid overwatering the plants. Overly wet soil can lead to root rot and other diseases. Monitor the soil moisture level and adjust your watering schedule accordingly. Remember, it’s better to underwater than to overwater.
Mulching and Weed Control
Mulching offers several benefits when it comes to growing acorn squash. It helps conserve moisture by reducing evaporation, regulates soil temperature, and suppresses weed growth. Choose an organic mulch, such as straw, compost, or shredded leaves, and apply a layer around the base of the plants.
When choosing the right mulch, consider the climate and availability of materials. In warmer climates, a lighter mulch that allows air circulation, such as straw, may be more suitable. In cooler regions, a heavier mulch, such as shredded leaves, can help insulate the soil and retain heat.
Controlling weeds is essential to reduce competition for nutrients and water. Regularly inspect the planting area and remove any weeds by hand, being careful not to disturb the roots of the acorn squash plants. Mulching also helps smother weed growth, making it easier to keep the garden weed-free.

Managing Pests and Diseases
Like any other plant, acorn squash can be prone to pests and diseases. Common pests that affect acorn squash plants include squash bugs, cucumber beetles, and aphids. To manage these pests naturally, you can introduce beneficial insects like ladybugs and lacewings or use organic insecticidal soaps and neem oil.
It’s important to regularly inspect the plants for signs of pest activity and take appropriate measures to prevent infestations. Additionally, practicing crop rotation and maintaining good garden hygiene can help minimize pest populations and reduce the risk of disease spread.
Diseases such as powdery mildew and bacterial wilt can also affect acorn squash plants. Monitor the foliage for any signs of disease, such as yellowing, wilting, or spotting. If you notice any symptoms, promptly remove and destroy the affected plant material to prevent further spread. Fungicidal sprays or organic treatments can be used to manage certain diseases, but prevention and early detection are key.
Supporting the Growing Plants
Understanding the vine growth habits of acorn squash plants is essential for providing appropriate support. Acorn squash plants are sprawling vines that can take up a significant amount of space in the garden. To prevent damage to the fruit and promote proper air circulation, providing support structures is crucial.
One common method of supporting acorn squash plants is by using trellises or fences. Install sturdy trellises or fences along the planting area, ensuring they can withstand the weight of the growing vines and fruit. Gently train the vines to climb the support system, tying them with soft plant ties if necessary.
Pruning is also an important aspect of supporting acorn squash plants. Regularly remove any dead or damaged leaves, as well as any excessive growth that can hinder air circulation and promote disease development. Pruning also helps redirect the plant’s energy to fruit production, resulting in larger and healthier squash.

Harvesting
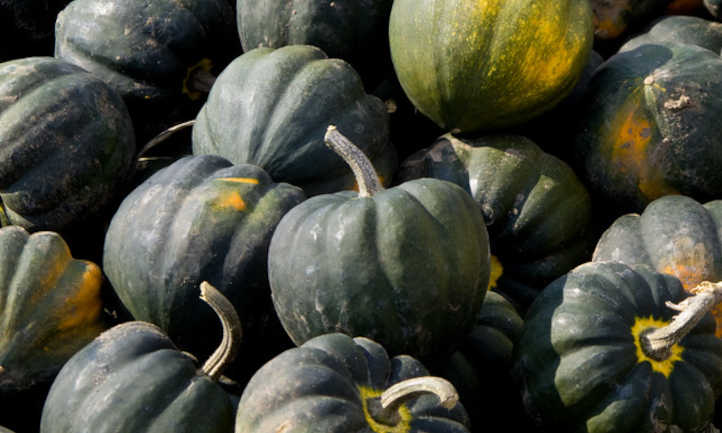
Knowing the signs of ready-to-harvest acorn squash is crucial to ensure optimal flavor and texture. Acorn squash is typically ready for harvest when the skin has turned dark green or orange and the fruit feels hard when pressed. It’s important not to let the squash overripen on the vine, as it may lose quality and become less flavorful.
To harvest the acorn squash, use a sharp knife or pruning shears to cut the stem about an inch above the fruit. Be careful not to damage the plant or the other developing fruits. After harvesting, it’s recommended to cure the squash to improve its flavor and extend its storage life.
Curing involves placing the harvested squash in a warm, well-ventilated area for 1 to 2 weeks. This allows the skin to toughen and the flavors to develop fully. Once the squash is cured, it can be stored in a cool, dry location with good air circulation.
Troubleshooting Common Issues
Some common issues that you may encounter when growing acorn squash include wilting or yellow leaves, lack of fruit formation, and small or misshapen squash. Wilting or yellow leaves can be a sign of either overwatering or underwatering, so it’s important to adjust your watering routine accordingly.
If your acorn squash plants aren’t producing fruits, it could be due to inadequate pollination. Acorn squash plants have both male and female flowers, and insects or wind usually transfer the pollen between them. To encourage pollination, you can gently shake the plants or use a small brush to transfer the pollen manually.
Small or misshapen squash can be caused by various factors such as poor pollination, nutrient deficiencies, or inconsistent watering. Maintaining a consistent watering and fertilizing routine, providing the plants with adequate sunlight and nutrients, and properly managing pests and diseases can help prevent these issues.
Remember, growing acorn squash requires patience and attention to detail. By following these guidelines and techniques, you’ll be well on your way to a bountiful harvest of delicious, homegrown acorn squash.


