Imagine harvesting your own delicious and nutritious butternut squash from your backyard, proudly serving it as the star ingredient in your homemade recipes. In this article, you will discover the secrets to successfully planting butternut squash seeds. From selecting the perfect location and preparing the soil to nurturing and caring for your plants, you will gain the knowledge and confidence to grow an abundant harvest of this delectable vegetable. Say goodbye to store-bought squash and hello to the satisfaction of growing your own mouthwatering butternut squash.

Choosing the Right Time and Location
Determining the Best Time to Plant
When it comes to planting butternut squash seeds, timing is crucial. You want to make sure that the soil is warm enough for the seeds to germinate and grow properly. Ideally, the soil temperature should be around 60 to 75 degrees Fahrenheit.
To determine the best time to plant, you can take into consideration the average date of the last frost in your area. After the danger of frost has passed and the soil has warmed up, it’s safe to start planting your butternut squash seeds.
Selecting the Ideal Location for Planting
Butternut squash plants require plenty of sunlight to thrive, so it’s important to choose a location that receives at least six to eight hours of direct sunlight each day. In addition to sunlight, the soil should be well-draining and rich in organic matter.
Before choosing the location, it’s also essential to consider the space requirements of butternut squash plants. These vines can spread up to 15 feet long, so make sure you have enough space for them to grow. It’s also advisable to grow them along a trellis or provide some support to keep the vines off the ground and reduce the risk of diseases.
Preparing the Soil
Testing and Amending the Soil
Before planting butternut squash seeds, it’s important to test the soil to ensure it has the right pH and nutrient levels. You can easily find soil testing kits at your local gardening store or send a soil sample to a professional lab for analysis.
Based on the soil test results, you might need to amend the soil by adding organic matter, such as compost or well-rotted manure. This will improve the soil’s texture, drainage, and fertility, providing a healthy environment for the butternut squash plants to grow.
Clearing and Preparing the Planting Area
Once you have tested and amended the soil, it’s time to clear and prepare the planting area. Remove any weeds, rocks, or debris from the area where you plan to plant the seeds. Loosen the soil with a garden fork or tiller, breaking up any clumps to create a smooth and crumbly texture.
Before planting the seeds, it’s a good idea to create mounds or hills in the planting area. This helps with drainage and encourages the soil to warm up faster. Each mound should be about 12 inches in diameter and 6 to 12 inches tall. Space the mounds at least 3 feet apart to allow for proper vine growth.

Germinating Butternut Squash Seeds
Starting the Seeds Indoors
To increase your chances of success, it’s recommended to start butternut squash seeds indoors. Around two to three weeks before the last anticipated frost, plant the seeds in small pots or seed trays filled with seed-starting mix.
Sow the seeds about one inch deep and water them lightly. Place the pots or trays in a warm and sunny location, such as a south-facing window or under grow lights. Keep the soil consistently moist but not waterlogged.
Germination Tips and Tricks
To expedite the germination process, you can soak the butternut squash seeds in warm water for a few hours before planting them. This will soften the seed coat and enhance germination rates.
Maintain a consistent temperature of around 70 to 85 degrees Fahrenheit during the germination period. You can use a seedling heat mat or place the pots on top of the refrigerator for added warmth.
Once the seeds have germinated and the seedlings have developed their first set of true leaves, it’s time to transplant them outdoors.

Transplanting Seedlings
Preparing Seedlings for Transplanting
Before transplanting the seedlings outdoors, it’s important to harden them off gradually. This means exposing them to outdoor conditions gradually to prevent shock. Start by placing the seedlings outside for a few hours each day, gradually increasing the time over the course of a week.
While hardening off the seedlings, it’s a good idea to water them thoroughly to ensure they are well-hydrated before transplanting. This will reduce the stress on the plants and give them a better chance of survival.
Transplanting Seedlings Effectively
When transplanting the seedlings, make sure the danger of frost has passed, and the soil temperature is consistently above 60 degrees Fahrenheit. Dig holes in the prepared mounds or hills, spacing them 2 to 3 feet apart.
Carefully remove the seedlings from their pots, being mindful not to disturb the roots too much. Place each seedling in a hole and backfill with soil, gently firming it around the base of the plant. Water the seedlings immediately after transplanting to help settle the soil.

Caring for Butternut Squash Plants
Watering and Irrigation
Proper watering is crucial for the health and productivity of butternut squash plants. Aim to provide about one inch of water per week. It’s better to water deeply once a week rather than shallowly and frequently. This encourages deep root growth and helps the plants become more drought-tolerant.
To prevent water-related diseases, such as powdery mildew, it’s important to avoid overhead watering. Instead, water at the base of the plants using a soaker hose or drip irrigation system. This helps keep the foliage dry, reducing the risk of fungal infections.
Fertilizing the Plants
While butternut squash plants don’t require excessive fertilization, they can benefit from a balanced organic fertilizer during the growing season. Apply the fertilizer according to the package instructions, usually every two to three weeks.
Additionally, incorporating compost or well-rotted manure into the soil before planting can provide a steady source of nutrients throughout the growing season. This will help promote healthy growth and abundant fruit production.
Weed Control and Mulching
Weed competition can hinder the growth of butternut squash plants, so it’s important to keep the planting area weed-free. Regularly remove any weeds that emerge, taking care not to disturb the plant’s shallow roots.
Applying a layer of organic mulch, such as straw or wood chips, can help suppress weed growth and conserve soil moisture. Mulching also helps regulate soil temperature and prevents the fruit from direct contact with the soil, reducing the risk of rot.
Supporting and Training the Vines
Butternut squash plants are vigorous climbers, and their long vines need support to prevent them from sprawling all over the garden. Installing a sturdy trellis or providing some type of support, such as a fence or stakes, will help keep the vines upright and save valuable garden space.
As the vines grow, gently guide them towards the trellis or support structure. You can use soft twine or plant clips to secure the vines without causing damage. Regularly check the vines and adjust their position as necessary to ensure they are climbing in the desired direction.
Dealing with Pests and Diseases
Unfortunately, butternut squash plants can attract pests and diseases, such as squash bugs, cucumber beetles, and powdery mildew. To minimize damage, regularly inspect the plants for signs of pests or diseases.
Hand-picking and removing pests can be an effective organic control method. Alternatively, you can use natural insecticides or insecticidal soaps targeted specifically for squash pests. When it comes to diseases, proper plant spacing, good air circulation, and avoiding overhead watering can help prevent powdery mildew and other fungal infections.

Harvesting and Storing Butternut Squash
Determining the Right Time to Harvest
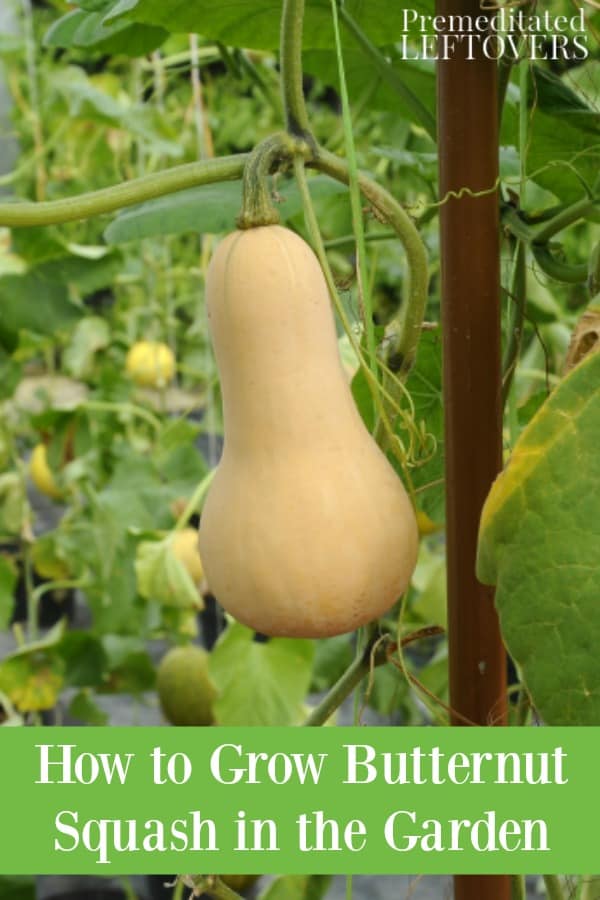
Butternut squash is typically ready for harvest when the skin becomes hard and turns tan or beige. The fruit should feel firm and have a tough rind that is difficult to penetrate with a fingernail. Harvesting too early can result in immature squash with poor flavor and a short storage life.
To further ensure the readiness of the squash, check the curling of the stem near the fruit. If the stem is completely dry and easily breaks away from the fruit, it’s a good indication that the squash is ready to be harvested.
Proper Harvesting Techniques
To harvest butternut squash, use a sharp knife or pruning shears to cut the fruit from the vine, leaving about an inch of stem attached. Avoid tearing or damaging the fruit during the harvesting process, as this can make it more susceptible to rot.
Handle the harvested squash with care to prevent bruising or any other damage. Any minor cuts or blemishes can compromise the storage life of the squash, so it’s best to handle them as gently as possible.
Curing and Storing Butternut Squash
After harvesting, it’s important to cure butternut squash before storing it. This process involves allowing the squash to dry in a warm and well-ventilated area, such as a porch or garage, for about two weeks. Curing helps harden the skin and improves the flavor and longevity of the squash.
Once the squash is cured, store it in a cool and dry place with a temperature range between 50 and 55 degrees Fahrenheit. A basement or cellar can be a suitable storage location. Make sure to keep the squash away from moisture, light, and extreme temperatures, as these can cause spoilage.
By following these steps, you’ll be able to successfully plant, care for, and harvest butternut squash in your own garden. Enjoy the delicious taste and versatility of this popular winter squash!


