In this concise guide, you will be provided with a step-by-step explanation on the art of julienning apples. From selecting the ideal apple variety to mastering the precise cutting technique, this article aims to equip you with the necessary skills to effortlessly create elegant and delicate apple matchsticks. Whether you are an aspiring chef looking to impress with your culinary expertise or simply a home cook seeking to elevate your fruit presentations, this tutorial will guide you towards achieving impeccable julienned apples each time.

Gather the Necessary Tools and Ingredients
Before you begin julienning apples, it is important to gather all the necessary tools and ingredients. This will ensure that you have everything you need to complete the task efficiently and with ease. Here are the items you will need:
Selecting fresh and firm apples
When julienning apples, it is crucial to select fresh and firm apples. Look for apples that are free from bruising or blemishes. The skin should have a smooth texture and no wrinkles. Additionally, the apples should feel firm to the touch, indicating that they are ripe and ready to be used for julienning.
Sharp chef’s knife
A sharp chef’s knife is essential for julienning apples. A dull knife can make the task difficult and dangerous, as it may slip or require more force to cut through the apples. Invest in a high-quality chef’s knife with a sharp blade and ensure that it is properly maintained and sharpened for optimal performance.
Cutting board
A stable cutting surface is necessary to ensure safety and accuracy while julienning apples. Use a cutting board that is large enough to comfortably hold the apples and provides a sturdy base for cutting. Opt for a cutting board made of wood or plastic, as these materials are more forgiving on your knife compared to glass or marble.
Bowl of water with lemon juice
To prevent the julienned apples from browning, it is important to have a bowl of water with lemon juice ready. The acid in lemon juice helps slow down the oxidation process, keeping the apples looking fresh and appetizing. Fill a bowl with water and squeeze in the juice of one or two lemons, depending on the quantity of apples you plan to julienne.
Kitchen towel
Having a kitchen towel nearby is essential for drying the julienned apples after they have been soaked in the lemon water. Make sure the kitchen towel is clean and absorbent, as it will help remove excess moisture from the apples, ensuring that they stay crisp and ready for use.
Prepare the Apples
Now that you have gathered all the necessary tools and ingredients, it’s time to prepare the apples for julienning. Follow these steps to ensure that the apples are ready for slicing:
Wash the apples
Before peeling or slicing the apples, it is important to wash them thoroughly. Rinse each apple under running water, using your hands to gently rub away any dirt or debris. This will help remove any surface contaminants and ensure that you are working with clean apples.
Peel the apples
After washing the apples, peel off the skin using a sharp chef’s knife or a peeler. Start at the top of the apple and work your way down, following the natural contour of the fruit. Aim to remove only the skin, as the flesh beneath is where the julienned slices will come from.
Remove the core
Once the apples are peeled, it’s time to remove the core. There are several methods you can use to achieve this:
Apple corer: Use an apple corer to easily remove the core by inserting the corer at the top of the apple and pushing down until the core is completely removed.
Knife method: If you don’t have an apple corer, you can use a knife to cut around the core of the apple. Hold the apple upright and make a vertical cut about one inch away from the center. Repeat this on all four sides of the apple, creating a square shape around the core. Finally, make a diagonal cut from each corner of the square towards the core, removing the core and leaving you with four apple quarters.

Cut the Apples into Uniform Slices
Once the apples are peeled and cored, it’s time to cut them into uniform slices. This will ensure that the julienne pieces are consistent in size and shape, providing a visually appealing and evenly cooked end result. Follow these steps to achieve uniform slices:
For safety, use a stable cutting surface
Before proceeding with slicing the apples, ensure that your cutting board is secure and will not slip or move while you cut. A stable cutting surface is crucial to prevent accidents and ensure that you have control over the knife.
Slice off the rounded sides
To create a flat surface for stable cutting, start by slicing off the rounded sides of the apple. Place the apple on a stable cutting board and carefully cut off a small portion from each rounded side, creating a flat surface on one side of the apple.
Create a flat surface
After slicing off the rounded sides, place the apple on the flat surface created and stabilize it with your non-dominant hand. This will provide a secure base for slicing and ensure that the apple does not roll or move while you cut.
Slice the apple lengthwise
Using a sharp chef’s knife, slice the apple lengthwise into thin even slices. Aim for a consistent thickness, approximately 1/8 to 1/4 of an inch. Take your time and use steady, controlled motions while cutting to achieve uniform slices.
Maintain consistent thickness
As you slice the apples, be mindful of maintaining a consistent thickness throughout. This will ensure that the julienned apples are of the same size, allowing for even cooking and presentation. If necessary, make adjustments as you go to keep the slices uniform.
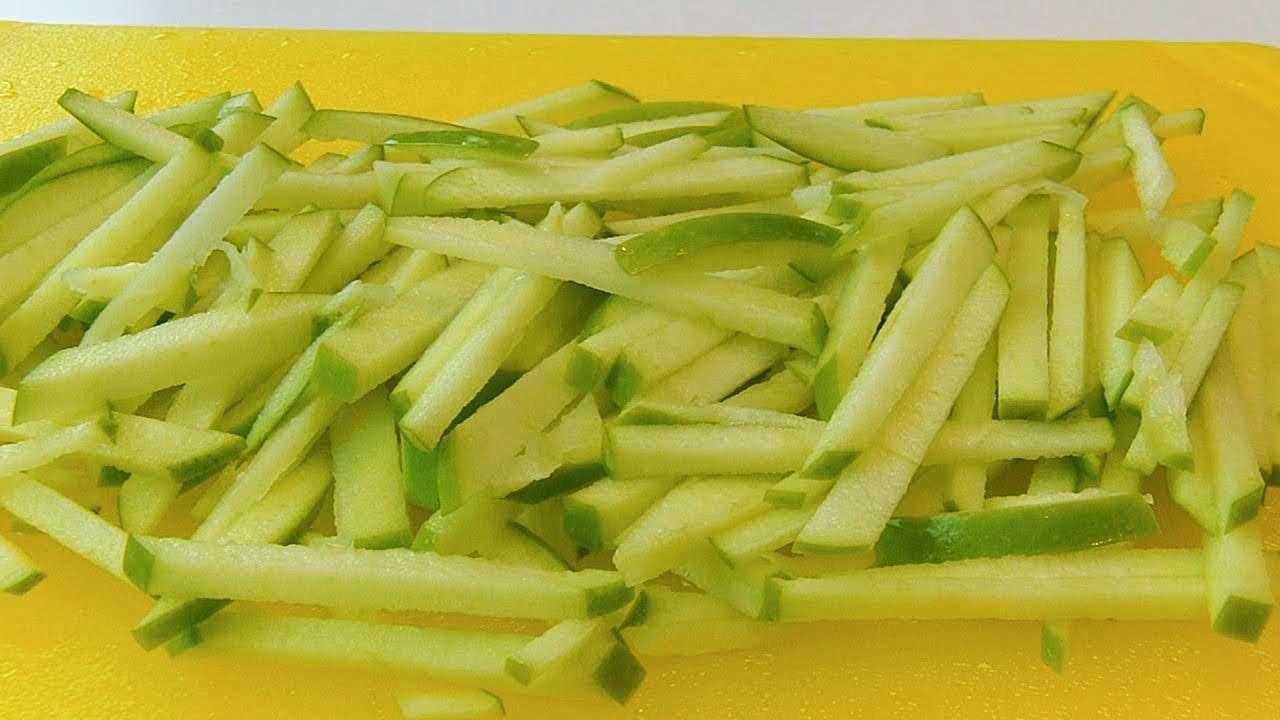
Stack and Cut the Apple Slices into Matchsticks
Now that the apples are sliced, it’s time to transform them into matchsticks. This will give the apples their characteristic julienne shape, perfect for adding texture and flavor to a variety of dishes. Follow these steps to stack and cut the apple slices into matchsticks:
Stack several apple slices together
Take a few apple slices and stack them neatly on top of each other. Aim for a stack that is about half an inch in height, depending on your preference and the desired size of the matchsticks.
Secure the stack with your non-dominant hand
Once you have a stack of apple slices, use your non-dominant hand to secure the stack. This will stabilize the slices and make it easier to cut them into matchsticks.
Make straight cuts across the apple slices
With the stack secured, hold the chef’s knife with your dominant hand and make straight cuts across the apple slices. Aim for matchstick-sized pieces, approximately 1/8 to 1/4 of an inch wide. Take care to maintain a steady hand and use controlled motions while cutting to ensure precise and even matchsticks.
Keep the matchsticks even in size
As you cut the apple slices into matchsticks, pay attention to keeping them even in size. Consistency is key for both aesthetic and practical reasons, as even-sized matchsticks will cook evenly and provide a pleasant texture in your dishes. Take your time and make adjustments as needed to achieve uniformity.

Preventing Browning
After julienning the apples, it is important to take steps to prevent browning. Apples tend to oxidize quickly when exposed to air, resulting in a brown color and potential loss of flavor. Here’s how you can prevent browning and keep your julienned apples fresh:
Immediately place the julienned apples in a bowl of water with lemon juice
As soon as you have finished julienning the apples, transfer the matchstick pieces into a bowl of water with lemon juice. The acid in the lemon juice will slow down the oxidation process, keeping the apples looking fresh and vibrant.
Ensure all pieces are fully submerged
To maximize the effectiveness of the lemon water, ensure that all pieces of apple are fully submerged. This will prevent any exposed surfaces from coming into contact with air and oxidizing.
Leave them in the lemon water for 3-5 minutes
Allow the julienned apples to soak in the lemon water for about 3-5 minutes. This will give the lemon juice sufficient time to coat the apple pieces, forming a protective barrier against oxidation.
Storing Julienne Apples
If you don’t plan on using the julienned apples immediately, it’s important to store them properly to maintain their freshness and prevent spoilage. Follow these steps to store your julienned apples:
Pat the julienned apples dry with a kitchen towel
Before storing, make sure to pat the julienned apples dry with a clean kitchen towel. Removing excess moisture will help prolong their shelf life and prevent them from becoming soggy.
Transfer them to an airtight container or resealable plastic bag
Place the dried julienned apples into an airtight container or resealable plastic bag. Ensure that the container or bag is clean and dry to prevent any moisture or air from entering and causing spoilage.
Squeeze out any excess air and seal tightly
Before sealing the container or bag, squeeze out any excess air to minimize contact with oxygen. This will further slow down the oxidation process and help maintain the freshness of the julienned apples. Once all the air is removed, seal the container or bag tightly.
Store in the refrigerator for up to 24 hours
Finally, place the container or bag of julienned apples in the refrigerator. The cold temperature will help preserve their freshness and extend their shelf life. It is recommended to use the julienned apples within 24 hours for best results.

Using Julienne Apples
Now that you have successfully juliened and stored your apples, it’s time to explore the various ways you can use them in your culinary adventures. Here are some ideas:
In salads for added crunch and sweetness
Julienned apples are a fantastic addition to salads, as they provide a refreshing crunch and a touch of natural sweetness. Toss them into green salads, coleslaws, or grain-based salads for a burst of flavor and texture.
As a garnish for desserts or savory dishes
Use julienned apples as a decorative garnish for both sweet and savory dishes. They can bring visual appeal and a burst of freshness to desserts like cakes, tarts, and pies. In savory dishes, julienned apples can add a refreshing element to soups, stews, or roasted meats.
In stir-fries or sautés for a refreshing flavor and texture
Add julienned apples to stir-fries or sautés for a delightful twist. Their crisp texture and natural sweetness can provide a refreshing contrast to savory ingredients like vegetables, meats, and sauces. The apples will add a pop of flavor and elevate the overall dish.
Recipes to Try with Julienne Apples
Looking for some inspiration to kickstart your culinary adventure with julienned apples? Try these delicious recipes:
Apple and Walnut Salad with Lemon Vinaigrette
This vibrant salad combines julienned apples with crisp lettuce, crunchy walnuts, and a tangy lemon vinaigrette. The flavors and textures complement each other perfectly, creating a refreshing and satisfying dish.
Caramelized Apple Tart
Indulge your sweet tooth with a decadent caramelized apple tart. Layer julienned apples on a buttery puff pastry base, drizzle with caramel sauce, and bake to golden perfection. Serve warm with a scoop of vanilla ice cream for a truly delightful dessert.
Curried Chicken and Apple Stir-Fry
Get creative with a curried chicken and apple stir-fry. Sauté julienned apples with diced chicken breast, bell peppers, and a flavorful curry sauce. The combination of the sweet apples and spicy curry creates a unique and delicious fusion of flavors.

Safety Tips
While julienning apples, it’s important to prioritize safety to minimize the risk of accidents or injuries. Keep these safety tips in mind:
Use a sharp knife to minimize the risk of slipping
A sharp knife is safer to use compared to a dull one, as it requires less force and provides better control over the cutting process. Ensure that your chef’s knife is kept sharp and in good condition to reduce the risk of slipping while julienning apples.
Be cautious of your fingers while cutting
Pay close attention to the placement of your fingers while cutting the apples. Keep your fingers tucked away from the blade and use a claw-like grip to hold the apple steady, ensuring that your fingertips are out of harm’s way.
Secure the cutting board properly
Before you begin cutting, make sure that the cutting board is placed on a stable surface and secured in place. If necessary, use a damp kitchen towel or a non-slip mat underneath the cutting board to prevent it from sliding or moving while you work.
Final Tips and Tricks
To ensure success with julienning apples, here are some final tips and tricks to keep in mind:
Experiment with different types of apples for varying flavors
While traditional apples like Granny Smith or Gala are commonly used for julienning, don’t be afraid to experiment with different apple varieties. Each apple has its own unique flavor profile, which can add depth and complexity to your dishes.
Work efficiently to prevent browning
Apples can brown quickly once exposed to air, so it’s important to work efficiently when julienning. Prepare all the necessary tools and ingredients beforehand to minimize the time it takes to julienne the apples.
Practice your knife skills for more precise cuts
Julienning apples requires precise knife skills, so take the time to practice and refine your technique. With practice, you’ll become more comfortable and skilled at creating even slices and matchstick-sized pieces.
By following these steps, you can confidently julienne apples and incorporate them into a variety of dishes. Whether you’re adding crunch to salads, garnishing desserts, or experimenting with savory recipes, julienned apples will bring a burst of flavor and texture to your culinary creations. Happy julienning!