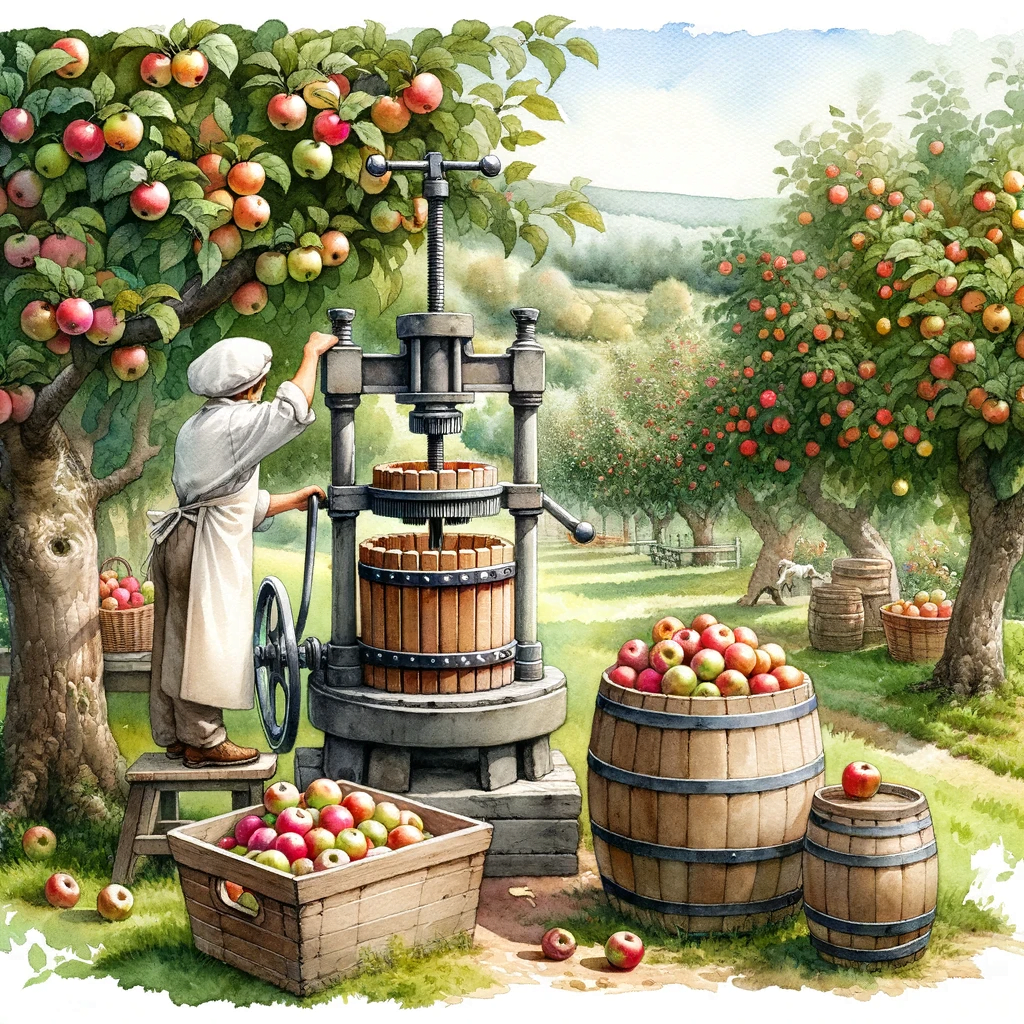
In this article, you will learn the step-by-step process of pressing apples to make your own delicious cider. From choosing the right apples to preparing them for pressing, we will guide you through the necessary equipment and techniques needed to achieve a high-quality batch of cider. Whether you are a beginner or a seasoned cider maker, this article will provide you with the essential knowledge to produce a refreshing and flavorful homemade cider. So, let’s dive into the world of apple pressing and unlock the art of cider making.
Choosing the Right Apples
When it comes to selecting apples for cider making, it is essential to choose the right varieties. Not all apples are suitable for cider production. While some apples are best for eating fresh or cooking, others have the perfect flavor profile for making delicious cider.
Selecting the Best Apple Varieties
The key to producing high-quality cider starts with selecting the best apple varieties. Look for apples that are known for their tannins, acidity, and sugar content. Tannins add complexity and depth to the cider, while acidity provides a pleasant tartness. Apples with a good balance of sweetness will ensure a flavorful final product. Some popular cider apple varieties include Kingston Black, Yarlington Mill, and Dabinett. However, there are also many excellent commercial apple varieties that can be used for cider making, such as Granny Smith and Golden Delicious.
Mixing Different Apple Varieties
To create a well-balanced cider with complex flavors, it is often recommended to mix different apple varieties. This allows you to combine the unique characteristics of each apple to achieve the desired taste. Experimenting with different combinations of apples can lead to surprising and delightful results. Consider using a blend of both cider-specific apple varieties and traditional eating apples to find the perfect balance of flavors in your cider.
Determining the Ripeness of the Apples
Ripe apples have a significant impact on the taste and quality of the resulting cider. When selecting apples for pressing, it is crucial to choose fruit that is fully ripe but not overripe. Overripe apples may have started to ferment or develop off-flavors, which can negatively affect the cider. Look for apples that are firm with no signs of decay or rot. A gentle squeeze should show a slight give but should not be mushy. It is also helpful to taste a sample apple to determine if it has the desired sweetness and acidity for cider production. Remember that the flavor of the cider will reflect the quality and ripeness of the apples used.
Preparing the Apples
Properly preparing the apples before pressing is an essential step in cider making. Thorough cleaning, removing imperfections, and cutting and chopping the apples are crucial to achieving a clean and well-extracted juice.
Cleaning and Washing the Apples
Before pressing your apples, it is crucial to clean and wash them thoroughly. Apples can accumulate dirt, debris, or residues from pesticides, which can impact the taste and quality of your cider. Start by rinsing the apples under cool running water, gently scrubbing away any visible dirt or debris. It is recommended to avoid using any detergents or cleaning agents, as they can leave behind unwanted residues. A clean, soft brush can be used to remove any stubborn dirt or wax buildup.
Removing Imperfections
Inspect each apple carefully and remove any imperfections. This includes any bruised, damaged, or rotting parts of the fruit. Imperfections can introduce off-flavors or spoilage organisms into the cider. Use a sharp paring knife to carefully cut away any damaged areas, ensuring that only healthy, ripe portions of the apple are used for pressing.
Cutting and Chopping the Apples
After cleaning and removing imperfections, it’s time to cut and chop the apples. The size and consistency of the apple pieces will impact the yield and efficiency of the pressing process. Some cider makers prefer to quarter the apples, while others choose to chop them into smaller pieces. Smaller pieces allow for more surface area to be exposed to the pressing action, maximizing juice extraction. Regardless of the method chosen, it is important to strive for consistency in the size of the apple pieces to ensure even pressing and extraction of juice.
Setting Up the Pressing Equipment
Once the apples are prepared, it’s time to set up the pressing equipment. This involves selecting a pressing method, choosing the right pressing equipment, and assembling everything properly.
Selecting a Pressing Method
There are several pressing methods to choose from, depending on the scale of your cider production and the equipment available. The two main methods are manual pressing and using an electric press. Manual pressing is suitable for small-scale operations and utilizes manual force to extract the juice. Electric presses, on the other hand, are more efficient and suitable for larger batches. Consider the amount of apples you have, your budget, and your processing capabilities when selecting the pressing method.
Choosing the Right Pressing Equipment
The pressing equipment you choose will greatly influence the efficiency and effectiveness of the pressing process. Look for a press that is well-constructed and made from food-grade materials. The capacity of the press should match your production needs. Consider the size and design of the press, ensuring that it is capable of handling the volume of apples you intend to press. Additionally, check if the press comes with proper filters or cloths for extracting the juice effectively.
Assembling the Pressing Equipment
Proper assembly of the pressing equipment is crucial to ensure smooth and efficient operation. Follow the manufacturer’s instructions carefully when assembling the press. Ensure that all parts are securely tightened and properly aligned. Check that any filters or cloths are in place and properly positioned. Taking the time to assemble the pressing equipment correctly will prevent any issues during the pressing process and promote optimal juice extraction.
Pressing the Apples
With the apples prepared and the pressing equipment set up, it’s time to press the apples and extract the juice. Proper crushing and the choice between manual or electric pressing will determine the success of this step.
Crushing the Apples
Before pressing, the apples need to be crushed to release their juices. There are various methods of crushing apples, depending on the equipment available. Some cider makers use a fruit crusher or a mechanical shredder to break down the apples into small pieces. Others choose to use a traditional method such as using a mallet or rolling pin to crush the apples. Whatever method you choose, ensure that the apples are thoroughly crushed and that the juice can be easily extracted during pressing.
Using a Manual Press
If you are using a manual press, carefully load the crushed apples into the press cavity. Apply steady pressure to the press handle, gradually increasing the pressure to extract the juice. It is important to apply consistent and even pressure throughout the pressing process. Take breaks to allow the juice to flow freely and avoid overtaxing the press. Manual pressing requires more effort but can still yield excellent results.
Using an Electric Press
For those using an electric press, the process is generally more straightforward. Follow the manufacturer’s instructions for loading the crushed apples into the press. Power on the press and allow it to exert the required pressure to extract the juice. Electric presses are more efficient and require less physical effort. However, it is still crucial to monitor the pressing process closely and ensure the juice flows smoothly without any clogs or obstructions.
Extracting the Juice
Pressing the apples extracts the juice, but the process doesn’t end there. To ensure a clear and sediment-free juice, it is necessary to properly filter and strain the extracted liquid.
Preparing the Pressing Cloth
To separate the juice from any solids or debris, use a clean and food-grade pressing cloth. Prior to pressing, ensure the cloth is properly cleaned and sanitized to avoid any contamination. Centrally position the pressing cloth within the press to allow for optimal juice extraction. The cloth should be able to capture any solids or pulp, allowing only the juice to pass through.
Loading the Press
Once the pressing cloth is in place, gently load the crushed apples into the press cavity. Avoid overfilling the press, as this can result in uneven pressing and difficulties in extracting the juice. Spread the apple pulp evenly, ensuring no air pockets or gaps exist. A consistent and evenly distributed load will promote a more efficient extraction process.
Pressing the Apples
With the press fully loaded, apply the necessary pressure to extract the juice. Slowly increase the pressure, allowing the juice to flow steadily. Keep a close eye on the juice collection container, ensuring it doesn’t overflow or become clogged. As the pressing progresses, adjust the pressure if needed to maintain a consistent flow of juice. Once no more juice is being extracted, the pressing is complete.
Filtering and Straining the Juice
After pressing, the extracted juice may contain some large particles or sediment. To obtain a clear and visually appealing cider, it is essential to properly filter and strain the juice.
Removing Large Particles
After pressing, allow the juice to settle for a short period of time. This settling time allows any large particles or solids to sink to the bottom of the container. Carefully decant the juice into a separate container, ensuring the solids are left behind. Be cautious not to disturb the settled particles during this process.
Using a Fine Mesh Sieve
To further remove any smaller particles or solids, pass the juice through a fine mesh sieve. This will help to refine the juice and eliminate any remaining unwanted material. Pour the juice slowly through the sieve, ensuring it passes through evenly without any blockages. The fine mesh sieve will capture any finer particles, leaving behind a clearer juice.
Using Cheese Cloth or Muslin
For a more thorough filtration, consider using a cheese cloth or muslin. Line a clean container with the cloth and gently pour the juice into it. The cloth will retain any smaller particles or sediment, resulting in a cleaner and clearer juice. Make sure the cloth is properly secured and tightened to prevent any leakage or seepage.
Clarifying the Juice
To achieve a brilliantly clear cider, it is necessary to clarify the juice after filtering and straining. This process involves allowing settling time, using pectinase enzyme, and filtering through activated charcoal.
Allowing Settling Time
After filtering and straining, allow the juice to rest undisturbed for a period of time. This settling time will encourage any remaining particles or haze to gradually sink to the bottom of the container. A few days of settling should be sufficient for the majority of particles to settle.
Using Pectinase Enzyme
To further clarify the juice and break down any pectin present, consider using pectinase enzyme. Pectin is a naturally occurring substance in apples that can cause cloudiness in cider. Follow the manufacturer’s instructions for adding the enzyme to the juice. Pectinase enzyme will help break down the pectin, resulting in a clearer and more visually appealing cider.
Filtering through Activated Charcoal
For exceptional clarity in your cider, filtering the juice through activated charcoal is an option. Use a food-grade charcoal filter or cartridge and pass the juice through it. The activated charcoal will absorb any remaining impurities, resulting in an even clearer and more polished appearance. Be mindful of the rate of filtration, ensuring it is slow and controlled to allow the charcoal to effectively remove any haze-causing substances.
Fermenting the Juice
Once the juice is properly clarified, it is time to initiate fermentation. This is a crucial step in turning the juice into cider and involves transferring it to a fermentation vessel, adding yeast, and providing the ideal conditions for fermentation.
Transferring to a Fermentation Vessel
Carefully transfer the clarified juice from the filtering container into a clean and sanitized fermentation vessel. The vessel should be made from food-grade material and have an airtight seal. Avoid overfilling the vessel to allow sufficient headspace for fermentation activity. Secure the vessel with an airlock to allow gas release while preventing any contaminants from entering.
Adding Yeast
To kickstart the fermentation process, add a suitable yeast strain to the juice. There are many yeast options specifically formulated for cider making. Follow the manufacturer’s instructions for the recommended amount of yeast to add, considering the volume of juice and desired fermentation characteristics. The yeast will consume the sugars present in the juice and produce alcohol and carbon dioxide as byproducts.
Covering and Storing for Fermentation
Once the yeast is added, cover the fermentation vessel tightly with the airlock in place. Place the vessel in a temperature-controlled environment, ideally between 60°F and 70°F (15°C and 21°C). It is important to maintain a consistent temperature throughout fermentation for optimal yeast activity and flavor development. Allow the cider to ferment undisturbed for several weeks, periodically monitoring the airlock for signs of fermentation activity.
Secondary Fermentation and Carbonation
After the initial fermentation is complete, secondary fermentation and carbonation can be achieved by racking the cider, adding priming sugar, and bottling and conditioning.
Racking the Cider
Racking is the process of transferring the fermented cider from one vessel to another, leaving behind any sediment or lees. Carefully siphon or transfer the cider into a clean and sanitized secondary fermentation vessel. This vessel should be airtight and have minimal headspace to reduce excessive exposure to oxygen, which can lead to spoilage. Racking helps improve the clarity of the cider and prepares it for carbonation.
Adding Priming Sugar
To achieve carbonation in the cider, add a calculated amount of priming sugar to the fermented juice. Priming sugar is a fermentable sugar that, when added to the cider, provides a food source for the remaining yeast, resulting in the production of carbon dioxide. Follow appropriate guidelines or recipes to determine the ideal amount of priming sugar based on the desired level of carbonation. Dissolve the priming sugar in a small amount of cider and mix it thoroughly before adding it to the cider.
Bottling and Conditioning
After adding the priming sugar, carefully transfer the cider into clean and sanitized bottles using a siphon or bottling wand. Seal the bottles tightly with caps or corks, ensuring a proper seal to retain the carbonation. Store the bottles in a cool and dark place for a period of time to allow the cider to condition and carbonate. The duration of this conditioning process can vary based on personal preference, but a few weeks to months is typical. Regularly check the carbonation level by opening a sample bottle, being cautious of potential gushing due to overcarbonation.
Storing and Aging the Cider
Once the cider has achieved the desired carbonation level, it is time to store and age the bottles. Proper storage containers and ideal storage conditions are essential to maintain the quality and flavor of the cider during aging.
Choosing the Right Storage Containers
Selecting the right storage containers is crucial to ensure the longevity and quality of the cider during the aging process. Opt for glass bottles with airtight seals to prevent oxidation and maintain carbonation. Avoid using plastic containers, as they may allow for the permeation of oxygen and potential off-flavors. Properly sanitize the bottles before transferring the cider to ensure a clean environment.
Determining the Ideal Storage Conditions
Aging cider requires specific storage conditions to enhance its flavors and promote the development of complex characteristics. Store the bottles in a cool, dark, and temperature-stable environment, ideally between 45°F and 55°F (7°C and 13°C). Fluctuations in temperature and exposure to light can accelerate the aging process or lead to off-flavors. Allow the cider to age undisturbed for several months to years, periodically sampling bottles to monitor flavor development.
Aging and Maturing the Cider
The length of aging required for the cider to reach its peak flavor will depend on personal preference and the specific characteristics of the cider. Some ciders may benefit from several months of aging, while others may improve with years of maturation. Through aging, flavors will mellow, complexities will develop, and the overall profile of the cider will become more refined. Experiment with different aging periods to find the perfect balance between freshness and complexity in your cider.
In conclusion, pressing apples for cider production is a meticulous process that involves various steps, from selecting the right apple varieties to storing and aging the finished cider. By carefully following each stage, paying attention to detail, and maintaining cleanliness and sanitation throughout, you can create exceptional homemade cider with unique flavors and a delightful drinking experience. Cheers to your successful cider-making journey!