In the world of grapes, seedless varieties tend to dominate the market due to their convenient consumption and culinary versatility. However, let us not overlook the potential hidden within grapes with seeds. Despite their somewhat antiquated reputation, these grapes hold a charm and unique flavor profile that can elevate your culinary endeavors. In this article, we will explore various creative ways to utilize grapes with seeds, offering you a refreshing perspective on their culinary potential. Get ready to unlock the untapped possibilities within these overlooked grapes and discover new dimensions of taste and texture.

Use Them in Recipes
Make Grape Juice
Grapes with seeds can be used to make delicious homemade grape juice. To begin, wash the grapes thoroughly to remove any dirt or debris. Then, remove the seeds by cutting the grapes in half and gently scooping out the seeds with a spoon. Next, place the seeded grapes in a blender or food processor and blend until smooth. Strain the mixture through a fine-mesh sieve or cheesecloth to separate the juice from any pulp or skins. Finally, pour the juice into a glass and serve chilled. You can also add a splash of lemon juice or sweeten it with a bit of honey if desired.
Bake Them into a Pie
Another delightful way to utilize grapes with seeds is by incorporating them into a scrumptious pie. Start by preheating your oven to the specified temperature for pie baking. Prepare your pie crust and set it aside. In a mixing bowl, combine the seeded grapes with sugar, flour, lemon juice, and a pinch of salt. Gently stir until the ingredients are well combined. Pour the grape filling into the pie crust and cover with a second crust or create a lattice pattern with strips of dough. Bake the pie according to the recipe’s instructions, until the crust is golden brown and the filling is bubbly. Allow the pie to cool before serving.
Create Grape Jam
Transforming grapes with seeds into a delectable jam allows you to preserve their flavors for longer periods. Start by removing the seeds from the grapes using the same method as for grape juice. In a large pot, combine the seeded grapes with sugar, lemon juice, and a small amount of water. Bring the mixture to a boil, stirring occasionally until the sugar has dissolved. Once the mix comes to a boil, reduce the heat to medium-low and let it simmer for an hour or until the jam reaches the desired thickness. Pour the hot jam into sterilized jars and seal tightly. Let the jars cool completely before storing them in the refrigerator.
Include Them in Salads
Grapes with seeds add a burst of flavor and texture to salads, making them a delightful addition to your culinary repertoire. Begin by washing the grapes and removing the seeds as previously mentioned. Next, prepare your salad ingredients by combining greens, such as spinach or mixed lettuce, with complementary ingredients like sliced almonds, crumbled feta cheese, and thinly sliced red onions. Add the seeded grapes to the salad and toss gently to combine. Drizzle your favorite dressing over the salad and serve immediately for a refreshing and nutritious meal.
Add Them to Fruit Skewers
Fruit skewers are a fun and visually appealing way to incorporate grapes with seeds into desserts or appetizer platters. Begin by washing the grapes and removing the seeds. Choose a variety of other fruits, such as strawberries, pineapple chunks, and melon balls, to accompany the grapes. Thread the fruits onto skewers in an alternating pattern. You can also add marshmallows or cubes of pound cake for added texture and sweetness. Arrange the fruit skewers on a platter and serve them as a delightful finger food option at parties or as a wholesome dessert for any occasion.
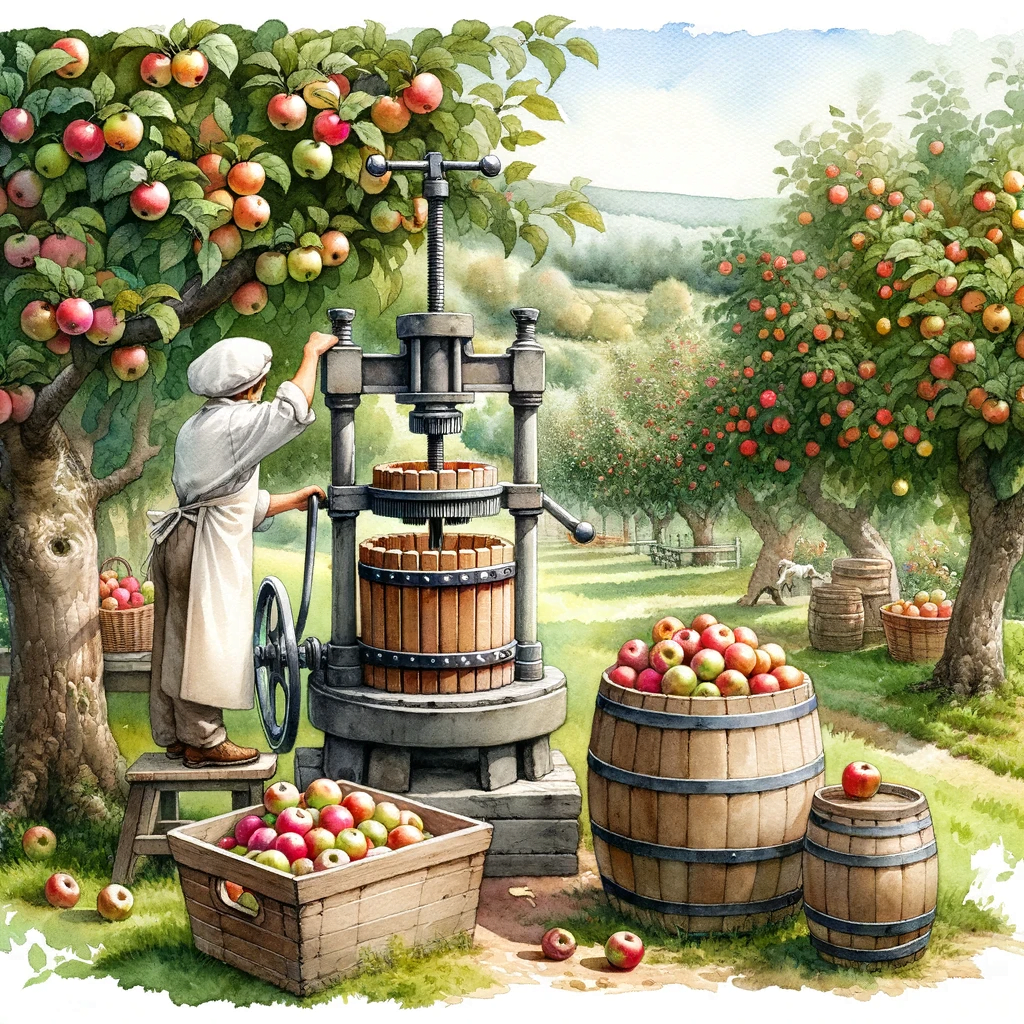
Make Homemade Wine
Select the Right Grapes
When making homemade wine, the selection of the right grapes is crucial for a successful fermentation process. Choose a grape variety that is suitable for winemaking, such as Cabernet Sauvignon or Chardonnay. Ensure that the grapes are ripe, free from rot or disease, and have a balanced sugar and acid composition. Research different grape varieties and consult local winemaking experts to determine the best options for your specific winemaking goals.
Extract the Seeds
While grape seeds can add depth and complexity to wines, some winemakers prefer to remove them for a smoother finished product. To extract the seeds, gently press the grapes with a sieve or strainer, allowing the juice to separate from the seeds. This process can be time-consuming but is worth the effort for those who prefer seedless wines.
Crush the Grapes
After removing the seeds, it’s time to crush the grapes to release the juice and initiate fermentation. Use a winemaking crusher or a sanitized container, such as a food-grade bucket or barrel, to crush the grapes. You can do this manually by stomping on the grapes with clean feet or by using a mechanical grape crusher. Remember to thoroughly sanitize all equipment to avoid any unwanted microbial growth.
Ferment the Juice
Once the grapes are crushed, transfer the juice to a fermentation vessel, such as a glass carboy or a food-grade plastic bucket. Add winemaking yeast to the juice to initiate fermentation. Monitor the temperature and ensure it remains within the recommended range for your selected yeast strain. Allow the juice to ferment until it reaches the desired level of sweetness or dryness, which can take several weeks to months. Regularly check the specific gravity and taste the wine during the fermentation process to determine when it is ready.
Bottle and Age the Wine
Once fermentation is complete, it’s time to bottle the wine. Sterilize the wine bottles and corks to maintain a clean environment. Carefully siphon the wine from the fermentation vessel into the bottles, avoiding any sediment or debris. Cork the bottles securely and store them in a cool, dark place for aging. Aging times can vary depending on the type of wine and personal preference. Some wines benefit from aging for several months or even years to develop their flavors and complexities.

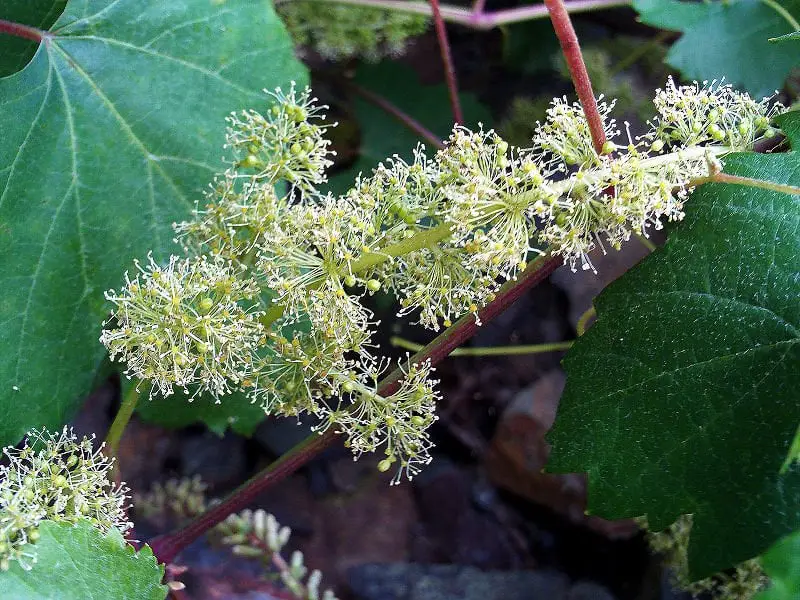
Plant Grapevines
Prepare the Soil
Before planting grapevines, it’s essential to prepare the soil to ensure optimal growth and productivity. Start by removing any weeds, rocks, or debris from the planting area. Loosen the soil using a garden fork or tiller to improve its drainage and aeration. Incorporate organic matter, such as compost or well-rotted manure, into the soil to enhance its fertility and nutrient content. Conduct a soil test to determine if any amendments, such as lime or sulfur, are needed to adjust the pH level.
Choose a Suitable Variety
Selecting the right variety of grapevine is essential for successful cultivation. Consider factors such as climate, soil type, and intended use (eating, winemaking, or both) when choosing your grape variety. Consult local gardening resources or contact your agricultural extension office for recommendations on grape varieties that thrive in your specific region.
Prepare the Planting Area
After selecting the grape variety, prepare the planting area by digging a hole that is wide and deep enough to accommodate the grapevine’s root system. Ensure that the hole is wide enough to spread out the roots without them being compressed or bent. Gently place the grapevine in the hole, making sure that the bud union (the swollen joint where the grapevine was grafted onto the rootstock) is positioned just above the soil surface.
Plant the Grapevines
Carefully backfill the hole with soil, making sure to remove any air pockets by gently tamping down the soil around the grapevine. Create a small mound of soil around the base of the grapevine to help retain moisture. Water the newly planted grapevine thoroughly to settle the soil and promote root establishment. Provide a sturdy trellis or support system for the grapevine to grow on, ensuring it has enough space to spread out its canopy.
Provide Necessary Care and Maintenance
To ensure the health and productivity of your grapevines, it’s crucial to provide proper care and maintenance. Regularly water the grapevines, especially during dry periods, to keep the soil evenly moist. Apply organic mulch around the base of the plants to help retain soil moisture, suppress weed growth, and provide nutrients as it breaks down. Prune the grapevines annually during their dormant season to remove dead or diseased wood, promote airflow, and maintain their desired shape. Monitor the plants for pests and diseases, and take appropriate action if any issues arise.
Feed Birds and Wildlife
Place the Seeds in a Bird Feeder
One way to put grapes with seeds to good use is by placing them in a bird feeder. Grapes contain essential nutrients and natural sugars that are a valuable food source for many bird species. Simply clean the grapes, removing any stems or leaves, and scatter them in a bird feeder or on a feeding tray. Ensure that the feeding area is easily accessible for birds to land and eat comfortably. Remember to change the grapes regularly to prevent spoilage and maintain a healthy feeding environment.
Create a Bird-Friendly Garden
Designing a garden that is attractive to birds not only benefits the avian population but also allows you to utilize grapes with seeds. Incorporate bird-friendly plants, such as berry-producing shrubs or trees, in your garden. Grapes can be planted along fences, trellises, or pergolas, providing birds with a natural food source. Additionally, consider installing birdhouses or nesting boxes throughout your garden to provide shelter and encourage nesting.
Attract Local Wildlife
Grapes can attract a variety of wildlife, not just birds. Create an inviting habitat for local wildlife by incorporating grapes into your landscape. Plant grapevines along fence lines or in a designated wildlife garden area. The grapes will entice creatures like squirrels, rabbits, and even deer. However, keep in mind that grapevines may need protection from excessive grazing by wildlife, and certain measures may need to be taken to prevent damage to the plants.
Build a Grapevine Trellis for Birds
Constructing a grapevine trellis specifically for birds can provide them with a designated feeding area and protect your grapevines from excessive bird damage. Use sturdy materials such as wooden posts and wire mesh to create a framework that will support the grapevines and allow birds to perch and feed comfortably. Attach the trellis securely to the ground to prevent tipping or movement. Place the trellis near your grapevines, ensuring that birds have easy access to both the trellis and the fruit.

Use Them for Decorative Purposes
Create a Fruit Centerpiece
Grapes with seeds can enhance the visual appeal of your table setting by being part of a stunning fruit centerpiece. Select a decorative bowl or platter and place a layer of fresh grapes as the base. Add other fruits of varying colors, shapes, and sizes, such as apples, oranges, and pears, to create an eye-catching arrangement. To add an extra touch, incorporate green leaves or sprigs of fresh herbs for a pop of color and fragrance.
Make Grape Garlands
Transform grapes with seeds into beautiful garlands that can be used for various decorative purposes. Thread a needle with a sturdy, thin thread or fishing line, leaving a long tail for tying purposes. Allow the grapes to dry for a day or two to prevent them from rotting during the garland-making process. Starting at the base of the grape, carefully pierce the needle through the center of each grape, threading them onto the thread. Leave enough space between the grapes to create a visually appealing pattern. Once you have threaded enough grapes, tie a knot at each end of the thread to secure the garland.
Display Them in Glass Jars
For a simple yet elegant decorative touch, display grapes with seeds in glass jars. Select clear glass jars of different shapes and sizes to add visual interest. Fill the jars with clean, fresh grapes, ensuring they are snugly packed without being crushed. Place the jars on a windowsill, mantelpiece, or dining table to create a refreshing and visually appealing display. Consider using jars of varying heights and arranging them in clusters for a more dynamic presentation.
Use Them as Table Décor
Incorporating grapes with seeds as part of your table décor can bring a touch of nature and elegance to your dining experience. Fill small, decorative bowls or baskets with fresh grapes and place them strategically on your dining table as a centerpiece or as individual accents. Combine the grapes with other decorative elements such as candles, flowers, or seasonal foliage to create a cohesive and aesthetically pleasing arrangement.
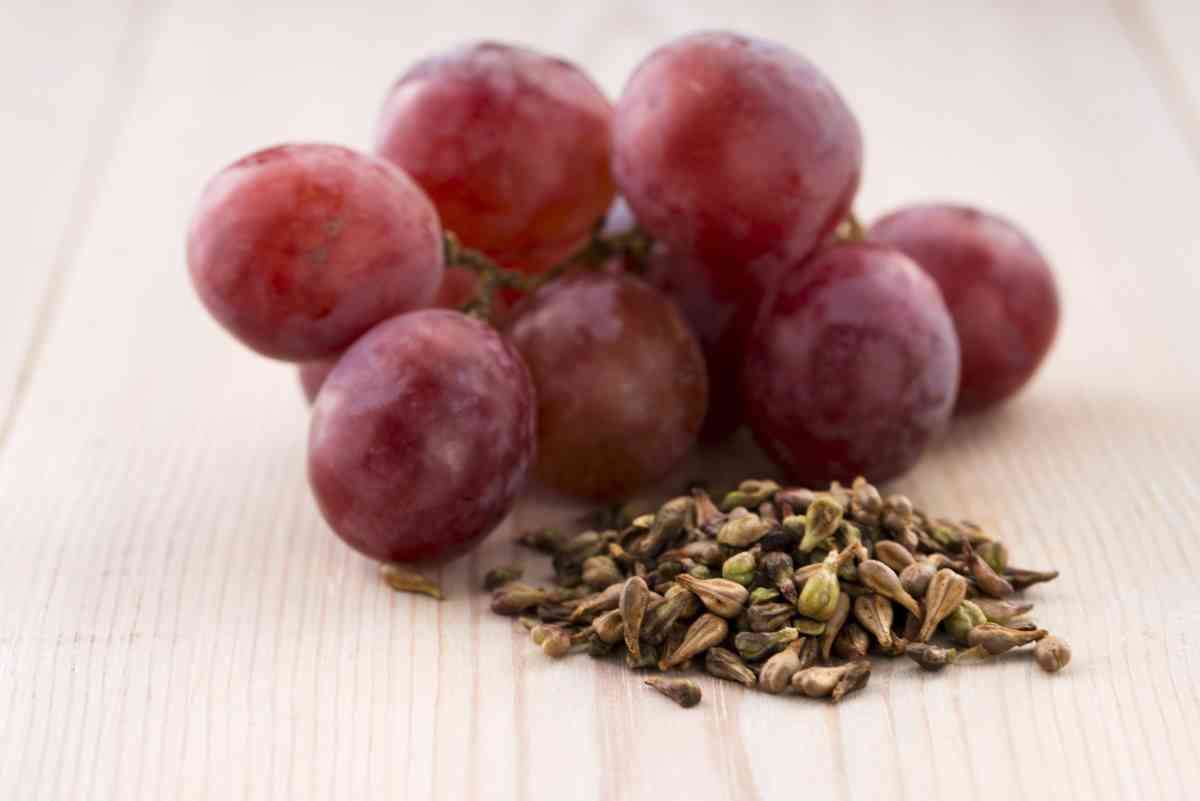
Compost the Seeds
Collect the Seeds
To compost grape seeds, start by collecting them from grapes that have been consumed or utilized in other recipes. Ensure that the seeds are clean and free from any pulp or remaining fruit flesh before composting. Use a knife or your fingers to separate the seeds from the grapes, placing them in a separate container.
Prepare Composting Area
Before adding the grape seeds to your compost, ensure that you have a designated composting area or bin. Choose a location in your garden that receives adequate sunlight and is easily accessible for regular maintenance. If using a compost bin, ensure that it has proper ventilation and drainage to facilitate the breakdown of organic matter. Alternatively, create a compost pile by layering organic materials directly on the ground.
Mix the Seeds with Other Organic Matter
To compost grape seeds effectively, they should be mixed with other organic matter to create a balanced compost mixture. Combine the grape seeds with a diverse range of compostable materials, such as kitchen scraps, yard waste, and shredded paper. Aim for a mix of “green” materials (e.g., fruit and vegetable scraps, grass clippings) and “brown” materials (e.g., dry leaves, straw) to maintain an optimal carbon-to-nitrogen ratio in your compost pile.
Monitor and Maintain the Compost
Regularly monitor your compost pile to ensure it remains properly balanced and to aid in the decomposition process. Mix the compost pile using a garden fork or compost turning tool to provide adequate aeration. Keep the compost moist, similar to a damp sponge, by watering it as necessary. Avoid adding diseased plant material or invasive weeds to prevent the spread of pests or diseases in your compost pile.
Use the Compost in Your Garden
Once the composting process is complete, and the organic materials have decomposed into a dark, crumbly substance, it is ready for use in your garden. Incorporate the compost into the soil by spreading a layer over the garden beds or mixing it into the planting holes. The nutrient-rich compost will improve soil structure, enhance moisture retention, and provide essential elements for healthy plant growth.

Create Natural Dye
Collect Grape Seeds
Grape seeds can be utilized to create natural dyes for fabrics or yarns. Collect a sufficient number of grape seeds and ensure they are clean and free from any pulp or remaining fruit flesh. It is best to accumulate grape seeds over time or save them specifically for dyeing purposes.
Dry and Grind the Seeds
Dry the grape seeds thoroughly before using them to create natural dye. Spread the seeds in a single layer on a baking tray or a clean, dry surface. Place them in a well-ventilated area away from direct sunlight and allow them to air dry for several days. Once completely dry, grind the seeds using a mortar and pestle or a coffee grinder until you achieve a fine powder. The powdered seeds will serve as the dye ingredient.
Prepare a Dye Bath
To create a dye bath, add water to a large pot and bring it to a simmer. The amount of water will depend on the quantity of fabric or yarn you wish to dye, so adjust accordingly. Gradually stir in the ground grape seed powder, ensuring an even distribution throughout the dye bath. Allow the dye mixture to simmer for approximately an hour to extract the color from the grape seeds fully.
Dye Fabric or Yarn
When dyeing fabric or yarn, it’s essential to prepare them beforehand to achieve optimal results. For natural fibers, such as cotton or wool, the fabric or yarn should be pre-mordanted. A mordant is a substance used to set the dye and improve colorfastness. Common mordants include alum, vinegar, or cream of tartar. Follow the instructions for the specific mordant you choose, as each may have different application methods and ratios.
After pre-mordanting, wet the fabric or yarn thoroughly and add it to the dye bath. Simmer the fabric or yarn in the dye bath for about an hour or until the desired depth of color is achieved. Stir occasionally to ensure even dye distribution. Keep in mind that the color will appear lighter when the fabric or yarn is wet, so allow it to dry completely before assessing the final shade.
Fix the Color
After dyeing the fabric or yarn, it is crucial to fix the color to enhance its longevity and prevent fading. Rinse the dyed material in cold water until the water runs clear to remove any excess dye. Then, carefully wash the fabric or yarn using a mild detergent to remove any remaining dye particles. Finally, rinse the material once again in cold water and let it air dry away from direct sunlight. By following these steps, you can enjoy beautiful, naturally dyed creations for years to come.
Make Grape Seed Oil
Collect Grape Seeds
Grape seeds can be used to make a fragrant and versatile cooking oil. Collect grape seeds by removing them from the grapes and ensuring they are clean and free from any pulp or remaining fruit flesh. You may need to accumulate seeds over time or set aside grapes specifically for extracting seeds.
Clean and Dry the Seeds
Before making grape seed oil, clean the collected grape seeds to remove any impurities. Rinse them thoroughly under cold running water, ensuring no debris or remaining fruit particles remain. After cleaning, spread the seeds in a single layer on a clean, dry surface and allow them to air dry completely. Drying may take several days, so ensure that the seeds are completely dry before proceeding.
Crush and Press the Seeds
To extract oil from grape seeds, crush them to break the outer shell and release the oil-rich kernels within. Use a mortar and pestle, or a clean, heavy object, to crush the seeds gently. Once crushed, transfer the seeds to an oil press. Apply pressure to the crushed seeds, either manually or using an electric pressing device, to extract the oil. Collect the oil in a clean container, ensuring it is free from any seed particles or impurities.
Filter the Oil
After pressing the grape seeds, the oil may contain sediment or solid particles. To obtain clear and pure grape seed oil, it is essential to filter it to remove any impurities. Use a fine-mesh sieve or cheesecloth to filter the oil carefully. Pour the oil into the sieve or wrap the cheesecloth around the opening of the container and strain the oil through it. Repeat the process if necessary until the oil is free from any solids.
Store the Grape Seed Oil
To ensure the freshness and longevity of your homemade grape seed oil, store it in a suitable container. Choose a dark glass bottle or a food-grade plastic container that is airtight and non-reactive. Fill the container with the filtered grape seed oil, leaving a small amount of space at the top to allow for expansion. Store the oil in a cool, dark place, such as a pantry or cupboard, to protect it from heat and light. Properly stored grape seed oil can be used for cooking, dressings, or as a finishing oil for various culinary applications.

Use Them in Skincare
Make a Grape Seed Face Mask
Grapes with seeds contain antioxidants and natural compounds that are beneficial for your skin. To create a grape seed face mask, start by mashing a handful of grapes with seeds to form a paste-like consistency. Apply the grape paste to your face, avoiding the eye area, and leave it on for about 15 minutes. Rinse off the mask with warm water and pat your face dry. This simple homemade mask can help nourish your skin, improve its texture, and provide a natural glow.
Create Grape Seed Oil Moisturizer
Grape seed oil can be used as an ingredient in a homemade moisturizer to hydrate and nourish your skin. Combine equal parts grape seed oil and a natural moisturizing agent, such as shea butter or coconut oil, in a clean container. Add a few drops of your favorite essential oil, such as lavender or rosemary, for a pleasant aroma. Mix the ingredients thoroughly until well blended. Apply the moisturizer to your face or body after cleansing, gently massaging it into your skin until fully absorbed.
Craft a Grape Seed Scrub
Exfoliating your skin regularly helps remove dead skin cells and promote a healthy, radiant complexion. To make a grape seed scrub, combine ground grape seeds with a natural exfoliant like sugar or sea salt. Add a small amount of grape seed oil to the mixture to bind the ingredients together and hydrate your skin. Gently massage the scrub onto damp skin in a circular motion, focusing on areas prone to dryness or roughness. Rinse off the scrub with warm water to reveal smoother, softer skin.
Include Them in Homemade Soap
Handmade soaps enriched with grape seeds offer nourishment and gentle exfoliation. To create grape seed soap, start by melting a natural soap base, such as shea butter or glycerin soap, using a double boiler or microwave. Once melted, grind grape seeds into a coarse powder and fold them into the melted soap base. Optionally, add a few drops of grapefruit or sweet orange essential oil for a refreshing scent. Pour the mixture into soap molds and let it cool and harden completely. Once set, unmold the soap and allow it to cure for a few weeks to ensure a solid and long-lasting bar.
Sprout Grape Seeds
Collect Grape Seeds
Collect grape seeds for sprouting by removing them from fresh grapes. Ensure that the seeds are clean and free from any pulp or remaining fruit flesh. It is best to accumulate seeds over time or set aside grapes specifically for sprouting purposes.
Clean and Dry the Seeds
Before sprouting grape seeds, clean them to remove any impurities. Rinse the seeds thoroughly under cold running water, ensuring no debris or remaining fruit particles remain. After cleaning, spread the seeds in a single layer on a clean, dry surface, and allow them to air dry completely. Drying may take several days, so ensure that the seeds are completely dry before proceeding.
Prepare Planting Containers
To sprout grape seeds, prepare planting containers that will provide a suitable environment for seed germination. Use small pots or seed trays with drainage holes to prevent waterlogged soil. Fill the containers with a well-draining potting mix, such as a combination of peat moss, perlite, and vermiculite. Ensure that the potting mix is slightly moist but not overly wet.
Plant the Grape Seeds
Plant the grape seeds in the prepared containers by gently pressing them into the soil to ensure good seed-to-soil contact. Cover the planted seeds with a thin layer of soil, approximately one-quarter inch deep. Use a mist sprayer or a fine spray nozzle to moisten the soil gently without causing waterlogging. Place the containers in a warm, well-lit area, avoiding direct sunlight.
Provide Optimal Conditions for Sprouting
To facilitate seed germination and sprouting, provide optimal conditions for the grape seeds. Maintain a consistent temperature between 70-80°F (21-27°C) to promote germination. Ensure that the soil remains consistently moist but not saturated. Mist the soil whenever it appears dry to the touch. Germination times may vary, but typically, sprouting should occur within two to four weeks.
As the grape seeds sprout and the seedlings develop, gradually acclimate them to more light by providing partial sun exposure. Once the seedlings have developed a root system and several true leaves, carefully transplant them into larger pots or directly into the ground, ensuring they have adequate space to grow. Continue to provide proper care, including regular watering, fertilization, and protection from extreme weather conditions, to promote healthy grapevines.